Showing posts with label fermentation. Show all posts

The Role of Heat Pads in Beer Fermentation

Wednesday, November 8, 2023
The artistry of brewing beer is matched by the rigorous science that underpins it, particularly in the realm of fermentation where temperature plays a pivotal role. It's in this process that yeast, the stalwart microbe responsible for turning wort into beer, performs its alchemical task. 

The sensitivity of yeast to temperature variations is well-documented; too cold, and it becomes sluggish, potentially halting fermentation prematurely. On the other hand, excessive heat can stress the yeast, leading to the production of undesirable flavors or, in extreme cases, the death of the yeast cells.

In the pursuit of maintaining the delicate balance required for optimal fermentation, heat pads have emerged as a crucial tool in the homebrewer's kit, especially when brewing in environments that naturally run cool. These devices, when selected and used with precision, can ensure that yeast remains active and healthy throughout the fermentation cycle, resulting in a beer that meets the brewer’s exacting standards.

Choosing the right heat pad is the first step toward achieving this goal. The size and wattage of the heat pad should correspond to the volume of the fermenter and the typical ambient temperature of the brewing space. A pad with adjustable heat output is particularly valuable, as it allows the brewer to dial in the precise temperature range that the beer style demands.

use of heat mats for fermentation

Once the correct heat pad is acquired, its positioning becomes the next critical factor. 

With the heat pad in place, diligent temperature monitoring is paramount. Whether it's a simple stick-on thermometer or a more sophisticated digital probe, keeping a constant eye on the temperature ensures that the heat pad's contributions are precise. 

For those heat pads that lack integrated thermostats, an external temperature controller becomes an essential accessory, cycling the pad on and off to keep the temperature within the desired bracket.

Efficiency with a heat pad doesn't just mean reaching the right temperature; it's also about maintaining it consistently. Constantly running the pad can lead to temperature spikes, so cycling the heat is a more efficient method. It's a balancing act where the heat pad provides warmth as needed, then rests, allowing the fermenter's own insulation to maintain the temperature. This approach not only saves energy but also prevents the yeast from being exposed to a fluctuating temperature environment.

Enhancing the efficiency of a heat pad can also be achieved through insulation. A simple insulating jacket or even a common blanket wrapped around the fermenter can keep the heat from dissipating too quickly, reducing the frequency with which the heat pad needs to activate.

Moreover, safety should never be an afterthought when using a heat pad. It's crucial to ensure that the pad is specifically designed for the rigors of brewing and that it's placed in a safe, dry location, well away from any combustible materials. Adherence to the manufacturer's guidelines isn't just about maintaining the warranty—it's about maintaining the safety of the brewing environment.

Beyond its primary role during fermentation, a heat pad's utility extends to other brewing processes, such as aiding in yeast propagation for starters or assisting in the decrystallization of honey for mead production. Its value is in its versatility, its ability to provide controlled warmth wherever the brewing process requires it.

In sum, the heat pad is a tool that, when wielded with knowledge and caution, becomes indispensable for homebrewers aiming to craft beers of consistent quality. It's a testament to the brewer's skill that such a simple device, integrated effectively into the fermentation process, can have a profound impact on the final product. By understanding and respecting the nuances of yeast metabolism and the thermal dynamics of fermentation, the homebrewer can turn the simple act of applying heat into a fine-tuned element of the craft.

How to tell if your beer wort fermented properly

Thursday, November 2, 2023
Fermentation is a crucial process in the beer-making journey, transforming a simple concoction of water and malt into the delightful beverage we all know and love. Without fermentation, your beer remains a 23-liter bucket of watery malt, void of the complex flavors and alcoholic content that define beer.

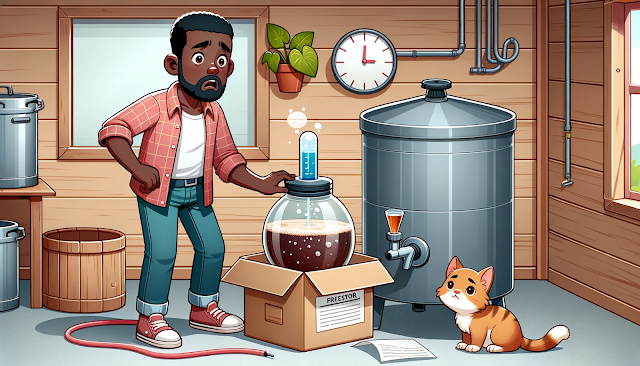
During the fermentation stage, homebrewers often encounter various challenges. A common concern is the absence of visible signs of fermentation, such as the lack of bubbles in the airlock. However, it's important to note that the absence of bubbles doesn't necessarily equate to a lack of fermentation.

The fermentation process can take a minimum of 15 Earth hours before the CO2 bubbles make their appearance through the airlock. Hence, patience is key. If you suspect your beer hasn't started brewing, there are several steps you can take to troubleshoot the issue.

how to tell if beer wort fermented correctly

For those using glass fermenters, inspect the interior for a dark scum that typically forms around the water level mark. This scum is a telltale sign of fermentation and can often be seen through the standard white fermenter drum. Similarly, the presence of foam, or 'krausen', is another indicator that your beer is fermenting as it should. Be sure to give it between 20 to 48 hours before you begin to worry.

In the case of plastic drums, the process is slightly different. If the drum is transparent, you can visually inspect it for the presence of scum. Alternatively, you can remove the airlock and peek through the hole to check for scum or foam.

A common mistake made by homebrewers is not sealing the fermenter properly. If the fermenter is not sealed tightly, CO2 can escape through the lid rather than the airlock, preventing the build-up of pressure necessary for gas to pass out of the water trap.

The location of your fermenter is another important factor to consider. Yeast, a crucial component in the fermentation process, becomes inactive in cold temperatures. Therefore, it's essential to ensure that your fermenter is stored in a warm place, away from cold sheds or garages where temperatures can drop to zero degrees centigrade.

A hydrometer is another useful tool that can help you determine whether your beer has fermented. A beer is typically considered fermented when the final gravity reading is 1/3 to 1/4 of the original gravity. This, of course, requires that you took an initial gravity reading before starting the fermentation process. 

If the readings remain the same over a 24-hour period, you've reached your final gravity, indicating that fermentation is complete.

wort fermentation completition


Once fermentation is complete, resist the urge to bottle your beer immediately. Allowing it to mellow for a longer period will result in a better-tasting, clearer brew. This is especially important for beginner brewers who may lack the patience to wait. Remember, brewing is a game of patience, and those who wait are rewarded with the best results.

But what if there are still no bubbles in the airlock? The most likely culprit is a leak that allows CO2 to escape. Ensure that your drum is tightened properly and that the tap is screwed in correctly. If you've checked for leaks and found none, the issue could be temperature-related. Ensure your beer is stored in a warm enough place, especially during the colder months.

For those brewing in winter, consider wrapping your fermenter in blankets or old sheets to keep it warm. This trick is particularly effective if the beer is already at an appropriate brewing temperature. Alternatively, you could store your fermenter in a warm place inside your house, such as the kitchen or living room.

correct fermentation of wort beer


Heat pads or panels are also popular options among brewers for maintaining a consistent brewing temperature. If you choose to use a heat pad, ensure that your brew is stored close to a power socket.

Lastly, yeast failure could be another reason for a lack of fermentation. Using fresh ingredients is essential, as old or dry yeast may not activate properly. When adding yeast, ensure that the solution is at the appropriate temperature, as specified in the beer kit instructions. Avoid adding yeast to boiling water, as this will kill the yeast and prevent fermentation.

In summary, here are some troubleshooting tips for homebrewers facing fermentation issues:
  • Check for leaks that may be allowing CO2 to escape.
  • Look for the presence of foamy residue or scum, both indicators of active fermentation.
  • Ensure that the fermenter is stored at an appropriate temperature for the type of beer you are making.
  • Consider using a heat pad to maintain a consistent brewing temperature.
  • Always use fresh ingredients and add yeast at the correct temperature.

No Bubbles in My Homebrew Airlock?

Wednesday, November 1, 2023
Every budding brewmaster eagerly awaits that first telltale sign of a successful brew: the gentle, rhythmic bubbles in the airlock. However, panic can set in when, even after 24 hours, the airlock remains eerily still.

So, the pressing question arises: why are there no bubbles rising out of the airlock?

One of the most common culprits behind a non-bubbling airlock is a simple leak. The bubbles in the airlock are produced by carbon dioxide, the by-product of the fermentation process. If there's a gap or an imperfect seal in your fermenter, this gas might find an alternative exit route. Before diving deep into troubleshooting, check the fermenter's lid and tap. Ensure everything is screwed tight and properly sealed.

Temperature can be a deceptive factor in brewing. While a summer brew might ferment without a hitch, colder temperatures can slow down the yeast's activity, causing a delay in those sought-after bubbles. If your fermenter is tucked away in a chilly garage or basement, consider relocating it to a warmer spot. An additional tip for those frosty months: wrapping your fermenter in blankets or old sheets can help insulate it and maintain a consistent brewing temperature.

no bubbles in fermenter drum airlock solive

Fermentation isn't always an instantaneous process. Depending on various factors, it can take anywhere from 15 hours to 48 hours before you notice any activity. Before hitting the panic button, give your brew some time.

Even if the bubbles are elusive, other signs can indicate that your beer is on the right track. A dark, frothy scum or krausen around the water level is a clear indicator of fermentation. This scum can be seen on the walls of the fermenter. Additionally, a foamy layer at the top is another positive sign. If you decide to inspect inside, ensure minimal exposure to the outside environment to prevent contamination.

If you've patiently waited and still see no signs of fermentation, there might be underlying issues:

Yeast Viability: Pitching yeast into an overly hot wort can be detrimental. Extremely high temperatures can destroy yeast cells. Also, if you're using an old yeast packet, it might not be potent enough to kickstart fermentation. In either case, consider repitching with a fresh batch.

You didn't add yeast to the boiling wort right? That will kill it.

Sanitization Slip-ups: While sanitation is crucial, some cleaning agents, if not rinsed off, can hinder yeast activity. Bleach, for instance, can leave residues that are detrimental to yeast.

Ensuring the airlock is adequately filled is essential. Too little water, and it might not function as intended. While water is the go-to filling liquid, some brewers, cautious about contamination, opt for vodka. It serves the dual purpose of allowing gas to escape while preventing bacterial entry.

But is an airlock indispensable? Must I use one when making beer?

Historically, beer was brewed long before the invention of modern airlocks. The primary purpose of an airlock is to let CO2 out while keeping contaminants at bay. If you find yourself without one, improvisations like a paper towel or cloth can work in a pinch, though ensuring a sterile environment becomes paramount.

Brewing is as much an art as it is a science. While bubbles in the airlock are a reassuring sign, their absence isn't a definitive indicator of failure. Observing, understanding, and adapting are essential skills in the brewmaster's toolkit. With patience and a bit of troubleshooting, you can ensure your brew is on the right track, bubbles or not. Cheers to the brewing journey!

Plastic or Glass Fermenting Drums? The Age-old Debate

Ah, the great fermenter debate that has been bubbling up in home brewing communities worldwide! With passionate arguments on both sides, it's clear that the choice between using plastic or glass fermenters isn't as simple as it seems. 

Let's delve into the intricacies of this matter.

Plastic Fermenters: The Common Choice for beer makers


1. The Infection Argument

Many naysayers point out the potential for infection when using plastic fermenters, a concern rooted in the idea that plastic is more susceptible to scratches that can become hiding spots for bacteria. On the surface, this seems like a valid concern. After all, the logic is straightforward: scratches can house bacteria, leading to a higher risk of contaminating the beer.

However, one's personal experience, combined with the vast number of successful brews from plastic fermenters worldwide, challenges this notion. If you've been brewing with plastic and have rarely, if ever, encountered an infection, then you've already debunked this myth based on personal experience.

2. Maintenance and Care

The key to preventing infections, irrespective of the fermenter material, lies in meticulous cleaning and sanitization. Every seasoned home brewer understands the paramount importance of cleanliness in the brewing process. And it's not just about avoiding infections; it's about ensuring the flavor, aroma, and overall quality of the beer remains top-notch.

Using cleaning agents like sodium percarbonate or the ever-popular PBW can make a world of difference. And of course, never underestimate the power of boiling water to eliminate any lurking microbes.

3. Cost and Durability

Plastic fermenters have another ace up their sleeve – affordability. Glass carboys, while durable and long-lasting, are notably more expensive. For budding brewers taking their first steps into the world of home brewing, plastic drums offer a more budget-friendly and less fragile alternative.

Glass Fermenters: The Traditionalist's Choice

glass fermenting drum or plastic debate


1. Oxygen and Aging Concerns

While plastic fermenters are widely used, there's a particular aspect where glass might have the upper hand: aging. Beer, especially during its brewing process, prefers minimal exposure to oxygen. Excessive O2 can alter the beer's flavor profile and even promote the growth of unwanted microorganisms.

Some argue that plastic is more permeable to oxygen than glass. But is this difference substantial enough to impact the final product? 

Most oxygen exchange, in reality, happens through the bung and airlock, not the vessel's walls.

adding hops to beer wort

2. Secondary Fermentation and Barrel-aging Effects

If you're looking to age your brew or impart specific characteristics, like those from barrel aging, glass carboys for secondary fermentation might be worth considering. However, this transfer process itself can introduce oxygen, a paradoxical challenge that brewers must navigate.

The debate between plastic and glass fermenters is a testament to the intricate and nuanced world of home brewing. Both materials have their merits and potential drawbacks, but the choice ultimately boils down to the brewer's preference, experience, and brewing goals.

What remains universally true, however, is the need for stringent hygiene practices and a deep understanding of the brewing process. Whether you're a novice brewer starting with a plastic drum or a seasoned pro with a collection of glass carboys, the journey of brewing is filled with learning, experimentation, and of course, some delicious beer!

How to Properly Store Your Bottled Homebrew Beer: An Essential Guide

Saturday, October 28, 2023
Crafting a homemade brew is more than just a hobby; it's a delicate balance between art and science, steeped in tradition and innovation. Each step, from selecting the finest ingredients to the intricate process of fermentation, reflects the brewer's dedication and passion for the craft. However, the journey doesn't end once the brewing is done. 

After investing considerable time and effort into creating the perfect concoction, understanding the nuances of storage and conditioning becomes paramount. Proper storage not only preserves the beer's integrity but also allows it to mature, enriching its flavors and textures. Conditioning, on the other hand, is akin to letting a fine wine age, enhancing its character and depth

The Journey from Wort to Bottled Delight

The initial stages of brewing are vital. From meticulously preparing the wort, selecting the perfect hops, potentially using a yeast energizer and a beer enhancer, to ensuring a proper fermentation period, every step contributes to the beer's final taste. After the fermentation and bottling, the next critical phase begins: bottle conditioning.

how to bottle condition beer bottled properly

Understanding Bottle Conditioning

Bottle conditioning isn't about merely stashing your beer in an old box and hoping for the best. It's an art in itself. When you add a second sugar dose to your bottled beer, you're setting the stage for a second fermentation. The residual yeast in the beer consumes this sugar, producing additional alcohol and, importantly, CO2, which carbonates the beer.

For this magic to happen, temperature is key. Just as the primary fermentation thrived at warm temperatures, the secondary fermentation in the bottle also requires warmth.

Temperature Matters: The Warm Phase

For optimal carbonation, beers should be stored between approximately 18 - 25°C for the first 5 to 7 days. This warm phase activates the yeast, allowing it to feed on the added sugar.

Transition to the Cool Phase

After the warm phase, transition your beers to a cooler environment, around 8 - 12°C. This temperature range promotes excellent beer conditioning.

Real experiences often best illustrate the importance of temperature. In one instance, during a chilly New Zealand winter, a batch of lager beer was left in a cold shed for a month. The result? Flat beer. The cold had rendered the yeast inactive, halting the fermentation. However, bringing the beers indoors to a warmer setting revived the yeast, leading to successful carbonation after two weeks.

But a word of caution: Extremely high temperatures can ruin your beer. A hot attic in summer can cause your beer to taste off, reminiscent of stale cardboard.

Key Tips for Optimal Beer Storage

Embrace the Shadows: Sunlight is beer's adversary. Particularly for those using green recycled bottles, exposure to excessive light results in 'skunked' beer, emanating an unpleasant odor. This occurs due to UV light breaking down the hops, which then react with the beer's proteins.

Patience is Virtuous: While your beer might be drinkable within a week, it truly shines after three weeks. Aging it for 5 to 6 weeks, or even finding a three-month-old forgotten gem, can offer a delightful tasting experience.

When serving, always opt for chilled beer. A cold beer reduces foamy overflows, making it more enjoyable. Overnight refrigeration is ideal for homebrews before serving.

Additional Considerations for Storage:

  • A consistent temperature is beneficial for storage.
  • Ales typically prefer mild temperatures.
  • Lagers lean towards cooler conditions than ales.
  • Central parts of your home might offer cooler environments than peripheral areas.
  • If beers are stored in too hot a location, relocate them promptly. Overheating can introduce unwanted flavors resembling methylated spirits or petrol. And your beer will be wrecked.
In the end, brewing is as much about the process as it is about the product. Proper storage and conditioning are the final steps in ensuring that every sip of your homebrew beer is a testament to your dedication and passion. 

Cheers!


How long can wort/beer be left in the primary fermenter?

Monday, October 23, 2023
In the vibrant world of brewing, understanding the nuances of fermentation can spell the difference between a good brew and an extraordinary one. Among the myriad of queries brewers face, one stands out prominently:

We'll explore this pivotal aspect in detail, encompassing risks, benefits, and advanced insights.

The world of brewing is brimming with myths and conventions. Is there a potential risk in allowing beer to remain in the primary fermenter for extended periods?

Let's dispel some misconceptions.
  • Conventional Wisdom vs. Reality:
  • While most brewers follow the standard week to ten-day fermentation guideline prescribed by their malt kit or beer recipe, this period primarily marks the conclusion of the initial fermentation stage.

  • However, fermentation isn't just about yeast converting sugars into alcohol. Multiple layers of chemical interactions occur post this phase, enhancing the overall character of the beer.
How long can wort be left in the primary fermenter?


Unraveling the Intricacies of Fermentation

  1. The Acetaldehyde Conundrum: Early fermentation produces acetaldehyde, responsible for the undesired sour apple flavor. However, with extended fermentation, yeast transforms this compound into ethanol, thereby refining the beer's flavor profile. This conversion is an essential step in ensuring that your brew doesn't have that amateurish aftertaste.

  2. Carbonation Dynamics: Extended fermentation often raises eyebrows due to potential carbonation concerns. True, prolonged cold storage can make the yeast dormant. Yet, this challenge isn't insurmountable. A gentle stir of the wort a couple of days before bottling can reinvigorate the settled yeast, aiding in efficient carbonation.

  3. Quest for Clarity: Every brewer appreciates the sight of clear beer. Extended fermentation aids sedimentation, allowing impurities to settle at the bottom of the fermenter. This natural filtration process ensures your bottled beer gleams without cloudy impurities.

  4. Temperature – The Silent Influencer: Yeast, being a living organism, is sensitive to temperature. Cooler environments retard its activity. If rapid fermentation is your aim in colder regions, patience becomes a key ingredient.

Venturing into Extended Durations: The 3-6 Month Territory

Daring brewers who've let their batches sit in fermenters for half a year or more have often reaped rewards for their patience. The essentials to remember:

  • Environment Matters: Protect your beer from its two arch-nemeses: heat and light. A cool, stable storage environment, coupled with protection from light, ensures your beer remains in prime condition.

  • Autolysis – A Double-Edged Sword: Extended fermentation can sometimes lead to 'autolysis', where yeast cells die and release potentially off-flavors. While this risk is generally low in optimal brewing conditions, a proactive measure is transferring the beer to a secondary fermenter, minimizing contact with the yeast sediment.

Bottle Conditioning: The Art and Science

Post-primary fermentation, the saga continues in the bottle. Here's what you should know:

  • Secondary Fermentation in the Bottle: With added sugar, yeast undergoes a secondary fermentation phase in the bottle, producing CO2. This natural carbonation process is what gives your beer its effervescence.

  • Optimal Conditioning Period: Typically, beers attain their best after three weeks of bottle conditioning. However, they often hit their peak drinkability stride around the five-week mark. It's also worth noting that hop-forward beers should be consumed once ready, as the impact of hops diminishes over time.

Brewing is as much an art as it is a science. While guidelines provide a roadmap, the journey to creating exceptional beer often involves experimentation, intuition, and a generous dose of patience. Whether you're a stickler for timelines or an advocate for extended fermentation, the ultimate goal remains: crafting a brew that resonates with passion, dedication, and expertise.

Here's to raising a toast to the age-old craft of brewing, and the endless possibilities it presents!

Powered by Blogger.
Back to Top