Showing posts with label beer kit. Show all posts

Do I need to boil a malt extract kit can?

Saturday, November 4, 2023

The process of homebrewing has a multitude of methodologies, each with its own set of proponents and detractors. Among these is the debate over the necessity, and indeed the merits, of boiling malt extract, especially when it comes from a beer kit. This article seeks to delve into the reasons why a brewer might choose to boil their malt extract and how to do it effectively, particularly when a hops schedule is part of the equation.

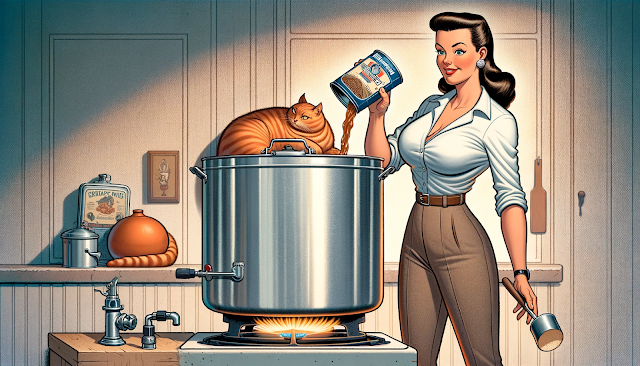
malt extract boiling ideas

Understanding Malt Extract Boiling

Traditionally, boiling is a critical step in all-grain brewing, serving multiple purposes: sterilization, enzyme deactivation, and flavor and color development. However, most malt extracts from beer kits have already been boiled by the manufacturer.

So, why would one consider reboiling?

One argument for boiling malt extract lies in the opportunity to layer additional complexity into the beer. Boiling can caramelize sugars, deepen flavors, and contribute to a stable finished product by reducing the risk of infection. It's an artistic touch that some brewers swear by, seeking to imprint a personal signature on a kit that might otherwise yield a predictably similar taste every time.

For those with a specific hops schedule in mind, boiling is non-negotiable. Hops utilization—the process by which hops contribute bitterness, flavor, and aroma to beer—is dependent on boiling. The alpha acids in hops need to be isomerized, a chemical process that occurs efficiently at boiling temperatures. If you've crafted a hops schedule, you'll need to boil to achieve the desired bitterness and hop character.

How to Boil Malt Extract from Beer Kits

Embarking on a malt extract boil is not a Herculean task, but it does require precision and attention to detail. Below is a structured approach to incorporating a boil into your beer kit regimen.

Preparing for the Boil

1. Equipment Check: Ensure you have a large enough pot to accommodate the boil and prevent boil-overs, which can be both dangerous and messy.

2. Water Volume: Start with a volume of water that will allow you to reach your target post-boil volume after evaporation. A good rule of thumb is to expect about 10-15% of volume loss to evaporation during a typical boil.

3. Malt Extract Addition: Add the malt extract to the water. It's advisable to do this slowly, stirring continuously to prevent scorching the extract on the bottom of the pot.

The Boil Process

1. Achieving a Rolling Boil: Bring your water and malt extract mixture to a rolling boil. This is a vigorous state of boiling that ensures maximum exposure for hops utilization and evaporation of unwanted volatile compounds.

2. Hops Schedule: Add hops according to your schedule. Typically, hops added at the beginning contribute to bitterness, while hops added in the last 15 minutes contribute to flavor and aroma.

3. Monitoring: Keep a close watch during the boil to prevent boil-overs and to ensure that your hops are added at the correct times.

boiling a malt extract beer kit


Post-Boil Considerations

1. Cooling: Once the boil is complete, the wort must be cooled as quickly as possible to a temperature suitable for yeast pitching. Rapid cooling helps to minimize the risk of infection and can improve the clarity of the finished beer.

2. Sanitation: As always with homebrewing, sanitation is paramount. Ensure that all equipment that comes into contact with the wort post-boil is thoroughly sanitized.

3. Fermentation: After cooling and transferring the wort to your fermenter, it's time to pitch the yeast and let fermentation take over.

In conclusion, while boiling malt extract from a beer kit is not strictly necessary, it provides an avenue for customization and can be a rewarding experiment for the homebrewer. Whether you're seeking to personalize the flavor profile of your beer or to implement a particular hops schedule, a well-executed boil can elevate a standard beer kit to a craft of your own making. As with any brewing process, meticulous attention to detail and an adherence to sanitation practices will yield the best results.

How to tell if your beer wort fermented properly

Thursday, November 2, 2023
Fermentation is a crucial process in the beer-making journey, transforming a simple concoction of water and malt into the delightful beverage we all know and love. Without fermentation, your beer remains a 23-liter bucket of watery malt, void of the complex flavors and alcoholic content that define beer.

During the fermentation stage, homebrewers often encounter various challenges. A common concern is the absence of visible signs of fermentation, such as the lack of bubbles in the airlock. However, it's important to note that the absence of bubbles doesn't necessarily equate to a lack of fermentation.

The fermentation process can take a minimum of 15 Earth hours before the CO2 bubbles make their appearance through the airlock. Hence, patience is key. If you suspect your beer hasn't started brewing, there are several steps you can take to troubleshoot the issue.

how to tell if beer wort fermented correctly

For those using glass fermenters, inspect the interior for a dark scum that typically forms around the water level mark. This scum is a telltale sign of fermentation and can often be seen through the standard white fermenter drum. Similarly, the presence of foam, or 'krausen', is another indicator that your beer is fermenting as it should. Be sure to give it between 20 to 48 hours before you begin to worry.

In the case of plastic drums, the process is slightly different. If the drum is transparent, you can visually inspect it for the presence of scum. Alternatively, you can remove the airlock and peek through the hole to check for scum or foam.

A common mistake made by homebrewers is not sealing the fermenter properly. If the fermenter is not sealed tightly, CO2 can escape through the lid rather than the airlock, preventing the build-up of pressure necessary for gas to pass out of the water trap.

The location of your fermenter is another important factor to consider. Yeast, a crucial component in the fermentation process, becomes inactive in cold temperatures. Therefore, it's essential to ensure that your fermenter is stored in a warm place, away from cold sheds or garages where temperatures can drop to zero degrees centigrade.

A hydrometer is another useful tool that can help you determine whether your beer has fermented. A beer is typically considered fermented when the final gravity reading is 1/3 to 1/4 of the original gravity. This, of course, requires that you took an initial gravity reading before starting the fermentation process. 

If the readings remain the same over a 24-hour period, you've reached your final gravity, indicating that fermentation is complete.

wort fermentation completition


Once fermentation is complete, resist the urge to bottle your beer immediately. Allowing it to mellow for a longer period will result in a better-tasting, clearer brew. This is especially important for beginner brewers who may lack the patience to wait. Remember, brewing is a game of patience, and those who wait are rewarded with the best results.

But what if there are still no bubbles in the airlock? The most likely culprit is a leak that allows CO2 to escape. Ensure that your drum is tightened properly and that the tap is screwed in correctly. If you've checked for leaks and found none, the issue could be temperature-related. Ensure your beer is stored in a warm enough place, especially during the colder months.

For those brewing in winter, consider wrapping your fermenter in blankets or old sheets to keep it warm. This trick is particularly effective if the beer is already at an appropriate brewing temperature. Alternatively, you could store your fermenter in a warm place inside your house, such as the kitchen or living room.

correct fermentation of wort beer


Heat pads or panels are also popular options among brewers for maintaining a consistent brewing temperature. If you choose to use a heat pad, ensure that your brew is stored close to a power socket.

Lastly, yeast failure could be another reason for a lack of fermentation. Using fresh ingredients is essential, as old or dry yeast may not activate properly. When adding yeast, ensure that the solution is at the appropriate temperature, as specified in the beer kit instructions. Avoid adding yeast to boiling water, as this will kill the yeast and prevent fermentation.

In summary, here are some troubleshooting tips for homebrewers facing fermentation issues:
  • Check for leaks that may be allowing CO2 to escape.
  • Look for the presence of foamy residue or scum, both indicators of active fermentation.
  • Ensure that the fermenter is stored at an appropriate temperature for the type of beer you are making.
  • Consider using a heat pad to maintain a consistent brewing temperature.
  • Always use fresh ingredients and add yeast at the correct temperature.
Powered by Blogger.
Back to Top