
Welcome to the world of homebrewing! You're about to turn water, grain, hops, and yeast into something magical. T
his guide is your trusted co-pilot, designed to walk you through your inaugural batch of beer using a simple, no-boil beer kit.
We're going to skip the complex, all-grain science for now and focus on the fundamental skills that will guarantee a delicious, successful first brew.
Think of this as Brewing 101. Follow these steps, embrace the process, and you'll be enjoying your very own handcrafted beer in just a few weeks. Let's get that first brew bottled!

The Golden Rule: You Are a Janitor First, a Brewer Second
This is the most important lesson in all of brewing. Your sugary wort is a perfect petri dish for microscopic invaders - wild yeast and bacteria - that will turn your beer sour and undrinkable.
You are not just brewing beer; you are creating a pristine environment where only your chosen yeast can thrive.
In brewing, cleanliness is not just a virtue; it is a necessity.
The Science of Sanitation
It's crucial to understand the difference: Cleaning removes visible dirt and grime (soil). Sanitizing eliminates invisible microorganisms. You must clean your equipment thoroughly before you sanitize it.
Use a no-rinse sanitizer like Star San.
It works by creating a highly acidic environment that ruptures the cell walls of bacteria and wild yeast, killing them on contact.
If a piece of equipment touches your beer after the boil, it must be sanitized. No exceptions. You do not want to brew an infected beer.
The tears this author has spilt over dumped batches could fill a keg.
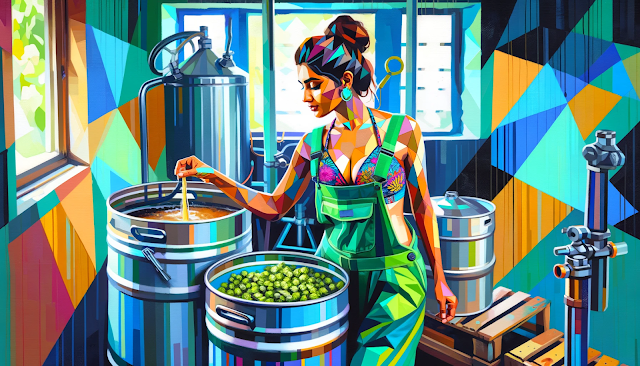
The Brewer's Protocol: A Step-by-Step Guide
This is the moment! Read your specific kit's instructions, but the process is generally universal. Let's begin.

- Prepare the Malt Extract: The thick malt extract in the can is easier to pour when warm. Place the unopened can in a sink of hot water for 10-15 minutes. This lowers its viscosity, ensuring you get every last drop of sugary goodness.
- Mix the Wort: Pour about 2 gallons of hot (not boiling) water into your sanitized fermenter. Open the can of malt extract and pour it in. Use a sanitized spatula to scrape the can clean. Add any additional sugars your kit recommends (like dextrose or dry malt extract). Stir vigorously with your sanitized long spoon until all the extract and sugars are completely dissolved. This sugar-rich liquid is now called "wort."
- Top Up and Aerate: Add cold, fresh water to the fermenter until you reach your target volume (usually 5 gallons or 23 liters). As you add the final gallon, let it splash! This is the ONE time you want to introduce oxygen into your beer. Yeast needs oxygen for its initial growth phase to build healthy cell walls.
- Check Temperature & Pitch Yeast: Use your sanitized thermometer to check the wort's temperature. It MUST be between 65-75°F (18-24°C). If it's too warm, wait. Pitching yeast into hot wort will kill it. Once in the correct range, open your yeast packet and sprinkle it evenly across the surface of the wort.
- Seal and Store: Securely fasten the lid on your fermenter. Insert your airlock (filled to the line with sanitizer) into the rubber stopper. Place the fermenter in a dark place that maintains a stable temperature, like a closet or basement.
Patience is a Virtue: Let the Yeast Do the Work
For the next 1-2 weeks, your job is to be a patient observer. Within 24-72 hours, you'll see signs of fermentation: vigorous bubbling in the airlock and a thick, frothy layer called a krausen on top of your beer.
The Science of Fermentation
Inside that dark bucket, a metabolic miracle is occurring. The yeast cells are consuming the simple sugars (glucose, maltose) in your wort.
Through an anaerobic process, they convert each sugar molecule into two molecules of ethanol (alcohol) and two molecules of carbon dioxide (the bubbles).
At the same time, they produce a symphony of other compounds, primarily esters, which contribute the fruity or spicy notes that define an ale.
Temperature control is key here; a stable 68°F (20°C) will result in a clean fermentation with balanced flavors.
Confirming Completion: Trust the Hydrometer, Not the Bubbles
After about a week, the bubbling will slow down or stop. This DOES NOT mean it's finished. The only way to know for sure is to take a gravity reading with your hydrometer.
Take a reading.
Wait two days.
Take another.
If the reading is stable, fermentation is complete.
Creating Carbonation and Maturing Your Beer

- Sanitize Everything Again: Bottles, caps, siphon, bottling wand—everything.
- Prime Your Beer: To carbonate your beer, you need to add a small, measured amount of sugar. Boil about 2/3 cup of corn sugar (dextrose) in two cups of water. Gently add this cooled syrup to your sanitized bottling bucket.
- Transfer and Fill: Carefully siphon the beer from the fermenter into the bottling bucket, leaving the sediment behind. The gentle motion will mix the sugar. Attach your bottling wand and fill each bottle, leaving about one inch of headspace.
- Cap and Condition: Cap each bottle securely. Store the bottles in a dark place at room temperature for at least two weeks.
The Science of Bottle Conditioning
Inside each sealed bottle, a mini-fermentation occurs. The dormant yeast wakes up, consumes the priming sugar, and produces a small amount of CO2.
With nowhere to go, this CO2 is forced to dissolve into the beer, creating carbonation.
This conditioning period is also crucial for flavor maturation, allowing harsh notes to mellow and complex flavors to meld together.
The Reward
Finally, the moment you've been waiting for. After at least two weeks, chill a bottle thoroughly in the fridge.
Pour it into a proper glass (you've earned it!) and savor the fruits of your labor.
Pay attention to the aroma, the creamy head, and the taste. Each element is a testament to the care you've invested.
It might not be perfect, but it's yours.


