Showing posts with label sanitization. Show all posts

The Ultimate Guide to No-Rinse Sanitizers for Beer Brewing Equipment

Sunday, November 19, 2023
Sanitization in brewing is not merely a step in the process; it's a cornerstone of quality assurance. The absence of proper sanitization can lead to microbial contamination, which manifests as off-flavors, unpleasant aromas, and even spoilage. 

This is not just about aesthetics or taste; it's about the integrity of the brew. The use of 'no-rinse' sanitizers elevates this practice by offering a convenient yet effective way to ensure that your beer or wine remains untainted by unwanted microorganisms. These sanitizers save time and water, making them an eco-friendly and efficient choice.

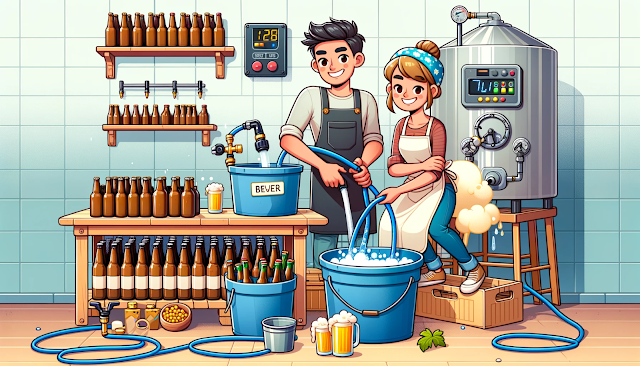
using no rinse santizer agents to clean brewing equipment

What Exactly is a 'No-Rinse' Sanitizer? The Science Behind the Convenience

The concept of 'no-rinse' sanitizers is rooted in their chemical composition. These solutions are formulated to kill bacteria, yeast, and molds effectively, and then break down into harmless substances that don't need to be rinsed away. This is a significant advantage over traditional sanitizers like caustic soda or bleach, which require a thorough rinsing to remove residues that could contaminate your brew. 

The 'no-rinse' feature is not just about convenience; it's about reducing the margin of error in the sanitization process. The less you have to handle your equipment, the fewer opportunities there are for contamination.

The Contenders: Choosing the Best No-Rinse Sanitizer

Star San: The Industry Standard Unveiled

Star San has carved a niche for itself as a reliable and effective sanitizer in the brewing community. But what sets it apart? 

First, let's delve into its active ingredients: phosphoric acid and dodecylbenzenesulfonic acid. Phosphoric acid disrupts the cell membrane of microorganisms, leading to cell death. 

Dodecylbenzenesulfonic acid acts as a surfactant, allowing the solution to spread more easily and penetrate microbial colonies.

The 'no-rinse' feature of Star San is not just a marketing gimmick; it's backed by science. When used at the correct concentration—specifically, one ounce per 5 gallons of water—the acids in the solution break down into phosphate and sulfate, which are harmless to your brew. This dual-action of cleaning and breaking down into benign substances makes Star San a holistic choice for brewers who demand efficacy without compromise.

no rinse sanitizer guide for beer equipment

Iodophor: The Medical-Grade Option Explored

Iodophor brings medical-grade sanitization to your home brewery. The active ingredient, iodine, has been a staple in antiseptics for decades. Iodine works by penetrating the cell walls of microorganisms and disrupting their metabolic processes, leading to rapid cell death. This makes Iodophor incredibly effective, but there's more to it than just germ-killing prowess.

Iodophor's no-rinse capability comes from its ability to sublimate—transition from a solid or liquid state into a gas—leaving no residue behind. This is why it's crucial to soak your equipment for at least 10 minutes; it allows the iodine enough time to both sanitize and then evaporate. While it's a powerful sanitizer, it's also gentle, making it a versatile choice for various brewing setups.

guide to no rinse sanitizers for home brew beer equipment

One Step: The Oxygen-Based Cleaner Decoded

One Step offers a unique approach to sanitization with its oxygen-based cleaner. The active ingredient, sodium carbonate peroxyhydrate, releases hydrogen peroxide upon dissolving in water. Hydrogen peroxide is a well-known antiseptic that works by producing free radicals that attack microbial cells.

What makes One Step particularly interesting is its rapid action. With just two minutes of contact time, it achieves a level of sanitization that rivals more traditional methods. This speed is attributed to the rapid breakdown of hydrogen peroxide into water and oxygen, leaving no harmful residues. This makes One Step not just a cleaner but a highly effective sanitizer that aligns with the no-rinse philosophy.

Sodium Percarbonate: The Laundry Room Gem Unearthed

Sodium percarbonate is the unsung hero of home brewing sanitization. Commonly found in laundry detergents like Oxi-Clean, it's a compound that, when dissolved in water, releases sodium carbonate and hydrogen peroxide. The latter is the active sanitizing agent, working in a similar way to the hydrogen peroxide released by One Step.

The appeal of sodium percarbonate lies in its accessibility and cost-effectiveness. It's a readily available household item that doubles as a brewing sanitizer. For those concerned about additives in laundry products, sodium percarbonate can also be purchased in its pure form, offering a no-frills, effective sanitization method.

The Verdict: Just Do It, But Do It Right

Choosing a no-rinse sanitizer is not just about picking a product; it's about aligning with a sanitization philosophy that values both effectiveness and convenience. Whether you opt for the tried-and-true Star San, the medical-grade Iodophor, the quick-acting One Step, or the household-handy sodium percarbonate, the key is to follow the usage guidelines meticulously. 

Proper concentration and contact time are crucial for any sanitizer to work effectively. 

Remember, the goal is not just to sanitize but to do so in a way that preserves the quality and integrity of your brew.


How to save time and make beer bottling easier

Sunday, November 5, 2023
Bottling beer is indeed one of the more labor-intensive aspects of homebrewing. The meticulous process of cleaning, sanitizing, filling, and capping can be time-consuming, but it's crucial for ensuring the quality of the final product. 

For those who aren’t ready to make the leap to kegging, due to either scale or expense, optimizing the bottling process is essential. Let’s explore five methods to streamline this process and get your beer bottled more efficiently.

brew save time beer


1. Mass Sanitization in a Large Container

Sanitizing is non-negotiable in brewing. To sanitize a large batch of bottles at once, use a sizable container, like a plastic washing basket. Fill it with water, add a cleaner like sodium percarbonate, which is no-rinse, and immerse your bottles. This method not only saves time but also ensures that each bottle is sanitized. For a 23-liter batch, a 30 or 35-liter bucket will suffice to accommodate all the bottles you’ll need.

2. Batch Priming

Batch priming is a method where you mix the total amount of priming sugar with the entire batch before bottling, rather than adding sugar to each individual bottle. This technique not only saves time but also minimizes the mess typically associated with sugar handling during bottling. It's a straightforward process that requires some calculations to determine the right amount of sugar needed, taking into account the type of beer and desired carbonation level.

3. Sugar Measurement for Priming

The quantity of sugar needed varies with the type of beer. Lager beers generally require more sugar to achieve higher carbonation compared to ales. Here are some commonly used measurements for a 23-liter batch:

  • Dextrose (Corn sugar): 3/4 cup or 4 or 5 oz / 95 grams
  • Cane sugar: 2/3 cup or 3.8 - 4.8 oz / 86 grams
  • Dry Malt Extract: 130 grams

For different volumes, it’s advisable to use a priming calculator to get the precise measurement.

4. Utilizing a Bottling Wand

A bottling wand simplifies the filling process. Attached to your tap, it allows for a controlled flow of beer into the bottle, minimizing oxygen exposure. The wand’s valve opens when the wand is pressed against the bottom of the bottle and closes when lifted, preventing spills and the need to constantly open and close the tap.

beer truck delivery

5. Choosing the Right Capping Tool

When it comes to capping, you have two main tools: the handheld capper and the bench capper. The handheld capper, like the universal Rigamonti or the Red Baron, is portable and easy to use. However, applying too much force can cause the bottle to break or make it difficult to remove the capper. 

The bench capper, on the other hand, offers a more stable capping process with a simple lever action, and it’s advisable to choose one that accommodates various bottle sizes.

Post-Bottling: Beer Conditioning

Once bottled, beer needs to condition. The conditioning environment should have a consistent temperature, with ales preferring cooler conditions and lagers tolerating slightly warmer ones. The location within your home matters, with central areas typically being cooler. Avoid direct sunlight and excessive heat, and after at least three weeks of rest, chill your beer before enjoying it.

By implementing these methods, you can greatly reduce the time and effort involved in the bottling phase of brewing. Not only does this make the process more enjoyable, but it also allows for greater focus on the quality and flavor of the beer, which is, after all, the ultimate goal of homebrewing.

Plastic or Glass Fermenting Drums? The Age-old Debate

Wednesday, November 1, 2023
Ah, the great fermenter debate that has been bubbling up in home brewing communities worldwide! With passionate arguments on both sides, it's clear that the choice between using plastic or glass fermenters isn't as simple as it seems. 

Let's delve into the intricacies of this matter.

Plastic Fermenters: The Common Choice for beer makers


1. The Infection Argument

Many naysayers point out the potential for infection when using plastic fermenters, a concern rooted in the idea that plastic is more susceptible to scratches that can become hiding spots for bacteria. On the surface, this seems like a valid concern. After all, the logic is straightforward: scratches can house bacteria, leading to a higher risk of contaminating the beer.

However, one's personal experience, combined with the vast number of successful brews from plastic fermenters worldwide, challenges this notion. If you've been brewing with plastic and have rarely, if ever, encountered an infection, then you've already debunked this myth based on personal experience.

2. Maintenance and Care

The key to preventing infections, irrespective of the fermenter material, lies in meticulous cleaning and sanitization. Every seasoned home brewer understands the paramount importance of cleanliness in the brewing process. And it's not just about avoiding infections; it's about ensuring the flavor, aroma, and overall quality of the beer remains top-notch.

Using cleaning agents like sodium percarbonate or the ever-popular PBW can make a world of difference. And of course, never underestimate the power of boiling water to eliminate any lurking microbes.

3. Cost and Durability

Plastic fermenters have another ace up their sleeve – affordability. Glass carboys, while durable and long-lasting, are notably more expensive. For budding brewers taking their first steps into the world of home brewing, plastic drums offer a more budget-friendly and less fragile alternative.

Glass Fermenters: The Traditionalist's Choice

glass fermenting drum or plastic debate


1. Oxygen and Aging Concerns

While plastic fermenters are widely used, there's a particular aspect where glass might have the upper hand: aging. Beer, especially during its brewing process, prefers minimal exposure to oxygen. Excessive O2 can alter the beer's flavor profile and even promote the growth of unwanted microorganisms.

Some argue that plastic is more permeable to oxygen than glass. But is this difference substantial enough to impact the final product? 

Most oxygen exchange, in reality, happens through the bung and airlock, not the vessel's walls.

adding hops to beer wort

2. Secondary Fermentation and Barrel-aging Effects

If you're looking to age your brew or impart specific characteristics, like those from barrel aging, glass carboys for secondary fermentation might be worth considering. However, this transfer process itself can introduce oxygen, a paradoxical challenge that brewers must navigate.

The debate between plastic and glass fermenters is a testament to the intricate and nuanced world of home brewing. Both materials have their merits and potential drawbacks, but the choice ultimately boils down to the brewer's preference, experience, and brewing goals.

What remains universally true, however, is the need for stringent hygiene practices and a deep understanding of the brewing process. Whether you're a novice brewer starting with a plastic drum or a seasoned pro with a collection of glass carboys, the journey of brewing is filled with learning, experimentation, and of course, some delicious beer!

↣ What is beerstone (and how to remove it)?

Monday, October 23, 2023
Every brewer, whether amateur or professional, is well-acquainted with the challenges that come with maintaining brewing equipment. 

One such challenge is the pesky formation of beerstone. This stubborn substance can compromise the quality of the brew and pose sanitation issues. 

In this article, we will delve deep into understanding beerstone and provide effective methods to eliminate it from brewing equipment.

What is Beerstone?

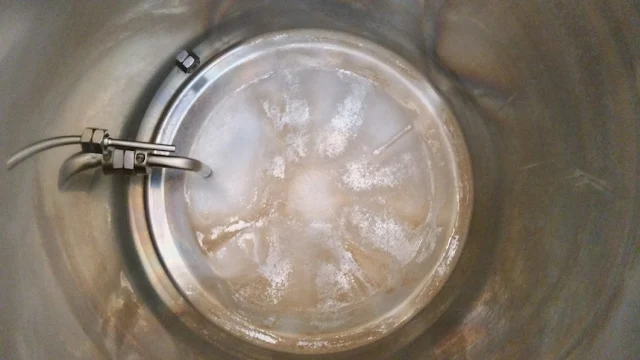
Beerstone, scientifically known as calcium oxalate, is a milky-white deposit that forms on brewing equipment over time. It's a combination of protein and mineral compounds that emerge during the brewing process. If left untreated, beerstone can harbor microorganisms, jeopardizing the quality and safety of the brew.

'calcium oxalate' - beerstone buildup

Why is Beerstone a Concern for Brewers?

  1. Sanitation Issues: Beerstone can be a breeding ground for bacteria and wild yeast, leading to contamination and off-flavors in the beer.
  2. Equipment Integrity: Over time, beerstone can corrode metal surfaces, reducing the lifespan of brewing equipment.
  3. Inconsistent Brews: The presence of beerstone can interfere with the brewing process, leading to inconsistent batches of beer.

Effective Methods to Remove Beerstone:

  1. Routine Cleaning: Regular cleaning with brewery-approved detergents can prevent the buildup of beerstone. Ensure to scrub all surfaces thoroughly, paying attention to nooks and crannies.

  2. Acidic Solutions: Phosphoric acid-based cleaners are particularly effective against beerstone. These cleaners dissolve the calcium compounds, making it easier to scrub away the beerstone. However, it's crucial to follow safety precautions when handling acids.

  3. Specialized Beerstone Removers: There are commercial beerstone removers available that are designed specifically to combat this issue. These removers often combine surfactants and chelators to break down and lift away beerstone deposits.

  4. Physical Scrubbing: Sometimes, elbow grease is the best solution. Using a non-abrasive scrubbing pad can help dislodge beerstone, especially when combined with effective cleaning agents.

  5. Preventive Measures: Using water softeners can reduce the mineral content in the water, which in turn reduces the potential for beerstone formation. Regularly inspecting and cleaning equipment after each brew can also prevent accumulation.

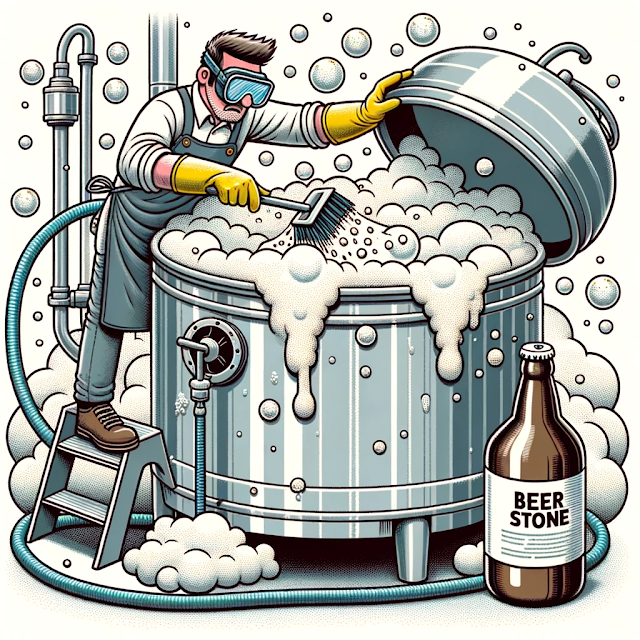
beerstone removal techniques


Safety First

When using chemical agents to clean brewing equipment, it's paramount to prioritize safety. Always:

  • Wear protective gloves and eyewear.
  • Ensure adequate ventilation in the cleaning area.
  • Thoroughly rinse equipment after cleaning to remove any residual chemicals.
  • Store cleaning agents out of reach of children and pets.

Conclusion

Beerstone is an inevitable challenge faced by brewers. However, with consistent cleaning, preventive measures, and the right cleaning agents, it's a challenge that can be efficiently tackled. By keeping brewing equipment free of beerstone, brewers can ensure the production of high-quality, consistent, and safe brews. Remember, a clean brewery is a successful brewery. Happy brewing!

Using Campden tablets combat infection when brewing cider


The 'Old School' Secret to Better-Tasting Beer

In the world of brewing, Campden tablets have long been revered as an 'old school' method to enhance the quality of beer. But what makes these tablets so special? 

Let's delve deep into the fascinating world of Campden tablets and their multifaceted uses in brewing.

using cambden tablets with beer brewing

Understanding Campden Tablets: The Super Pill of Brewing

At first glance, one might wonder if Campden tablets are some kind of super pill. Their primary components are potassium metabisulfite or sodium metabisulfite. Their primary function? To react with chlorine (or chloramine) when added to beer, cider, or wine, effectively removing it from the solution.

The best part? This entire process takes place without imparting any unwanted flavors to the beverage.

  • Dosage and Application: How Many Campden Tablets Should I Use? For this purpose, 16 tablets per gallon are recommended.
  • Removing Chlorine from Water: Half a tablet for every 5 to 6 gallons is sufficient, breaking down the chlorine in under 10 minutes.
  • Stabilizing Apple Juice for Cider Production: One crushed tablet per gallon of juice is ideal. Remember to wait for approximately 24 hours before introducing the yeast.
  • Combatting Infection in Cider or Wine: In cases of infections, 1 or 2 crushed tablets can be dissolved in the product. It's worth noting that the success of this method can vary.

Safety Concerns: Are Campden Tablets Safe to Use?

Absolutely. Over the years, these tablets have proved to be safe for consumption. A common query revolves around the release of sulfur dioxide. While it's true that sulfur dioxide is introduced into the water, its concentration diminishes massively by the time the beer is consumed, ensuring that the beer remains safe to drink.

Campden Tablets and Cider Production: A Crucial Relationship

Cider producers are well-acquainted with the threat of acetobacter bacteria contamination. Fortunately, while yeast remains resistant to Campden tablets, acetobacter is not, making these tablets a vital tool in cider production.

The Role of Campden Tablets in Wine Production

Campden tablets serve dual purposes in wine production:
  • Preventing Bacterial Growth: They deter stray bacteria from affecting the wine.
  • Acting as an Anti-Oxidizing Agent: Especially useful when transferring wine between containers, ensuring that any oxygen introduced is effectively neutralized.

Debunking Myths: Can Campden Tablets Halt Fermentation?

Contrary to popular belief, Campden tablets cannot be used to stop the fermentation process in wine or beer. Attempting to do so would require an excessive amount of tablets, rendering the beverage undrinkable.

campden tables for brewin beer ph


A Glimpse into History: The Origins of Campden Tablets

The story of Campden tablets dates back to the 1920s when the solution was developed by the Fruit and Vegetable Preserving Research Station in 'Chipping Campden', England. Its popularity soared when the Boots UK pharmacy chain introduced it in tablet form.

To Use or Not to Use: Are Campden Tablets Essential for Brewing?

The decision to use Campden tablets is subjective and depends on individual preferences and regional water quality. In places with high chlorine content, like Havelock North, New Zealand, the tablets come highly recommended. However, there are alternative methods available for those who opt against them, such as active carbon filters for removing chlorine and chloramine, and other sanitizing agents like sodium percarbonate and Powdered Brewery Wash for equipment sterilization.

campden tablets for beer making


Powered by Blogger.
Back to Top