Showing posts with label trub. Show all posts

Guide for cold crashing homebrew beer

Tuesday, October 31, 2023

Cold crashing is a refined method that has gained popularity among home brewers in recent decades. Originating from commercial brewing practices, the technique involves rapidly reducing the temperature of beer post-fermentation. This process coaxes unwanted particles to settle at the bottom of the fermentation vessel, resulting in a clearer beer with a smoother mouthfeel.

Beyond aesthetics, cold crashing can also influence the beer's overall taste, ensuring that it's free from yeasty or grainy undertones.

HOW TO COLD CRASH HOMEBREW BEER


Necessary Equipment and Preparation

Cold crashing demands precision, and having the right equipment is crucial:

  • Fermentation Vessel with an Airlock: A sealed environment is vital to prevent contaminants. A vessel with an airlock ensures that as the beer cools and contracts, it doesn't draw in outside air, which can introduce unwanted bacteria or oxygen.


  • Temperature-Controlled Refrigerator: A specialized brewing fridge or a modified household unit can work. The goal is to maintain a consistent cold temperature without freezing the beer.


  • Thermometer: Digital thermometers or temperature strips attached to the vessel give real-time readings, ensuring the beer stays within the desired range.

Before cold crashing, sanitize all equipment. Even minute contaminants can spoil the beer at these lower temperatures.

The Cold Crashing Process: Step-by-Step

  1. Ensuring Beer is Ready for Cold Crashing: Before taking this step, the beer must have completed its fermentation cycle. Using a hydrometer, check the beer's specific gravity. If the reading remains unchanged over two consecutive days, it indicates that the fermentation has ceased. Additionally, a clear taste devoid of sweetness suggests that the sugars have been fully fermented.

  2. Setting the Temperature: While the optimal range is between 32-40°F (0-4°C), some ales might benefit from slightly warmer temperatures, while lagers often require the colder end of the spectrum.

  3. Duration: 24-48 hours is a general guideline. However, heavy beers with a lot of sediment might require up to 72 hours.

  4. Monitoring: Maintain a log. Note down temperature fluctuations and their durations. This record can be a valuable resource for future brewing sessions.

Common Issues and Troubleshooting During Cold Crashing

Challenges can arise, but with knowledge, they can be navigated:

  • Incomplete Sediment Drop: If sediments persist, consider using fining agents like gelatin, which bind to particles and expedite their settlement.

  • Over-Carbonation: This can result from residual sugars fermenting in the bottle. To counteract, adjust your priming sugar calculations or consider using a priming sugar calculator.

  • Flavor Alterations: Changes in flavor can stem from various factors, including yeast strain or oxygen exposure. Always ensure a tight seal to minimize oxygen contact.

Post Cold Crashing Steps

Once the beer is cold crashed:

  1. Transfer: Use a siphon to transfer beer, ensuring minimal agitation. This prevents oxygenation and keeps the settled particles undisturbed.

  2. Conditioning: Depending on the beer type, this can range from a few days to several months. This phase allows the beer to carbonate and flavors to meld.

  3. Storage: Store bottles upright. This ensures any residual sediment compacts at the bottle's base, allowing for clearer pours.

cold crashing beer guide

Tips and Best Practices

For an enhanced cold crashing experience:

  • Using Fining Agents: Agents like gelatin or biofine clear can be added during cold crashing to further assist in beer clarification.

  • Prevent Oxidation: Every exposure to air risks oxidation. Always purge vessels with CO2 when possible.

  • Adapt Based on Beer Style: For instance, hazy IPAs might not need an extensive cold crash, while a pilsner would benefit from extended durations.

Cold Crashing vs. Other Clarification Methods

Cold crashing is but one tool in a brewer's arsenal:

  • Filtration: Effective but can be cumbersome for home brewers. Also, over-filtration can strip beer of essential flavors and aromas.

  • Extended Fermentation: This natural method can also clarify beer over time, but might alter the desired flavor profile.

  • Clarifying Agents: These range from natural agents like Irish moss, added during the boil, to post-fermentation additives like isinglass.

Conclusion

Cold crashing, a technique borrowed from commercial brewers, has empowered home brewers to achieve clarity and flavor profiles previously deemed challenging. As with all aspects of brewing, mastery comes with experience. By understanding the nuances of cold crashing and continually refining the process based on feedback and results, home brewers can consistently craft beers that are both visually stunning and delectably smooth. Here's to the relentless pursuit of the perfect pint!

Identifying 'Off Flavors' and Aromas in Your Homebrew

Saturday, October 28, 2023
Brewing is an intricate dance of science, art, and patience. It's not just about boiling grains, adding hops, and bottling. Sometimes, even when you think you've done everything right, you end up with a beer that tastes like cabbage, butter, or has the unmistakable stench of rotten eggs. Is it bad luck? Or is there a science behind these unwanted flavors?

The complex chemical reactions that occur during brewing are natural. At times, the aroma of hops might overshadow these reactions. It's essential to understand when these aromas and flavors are a genuine concern. 

Remember, as many seasoned brewers would attest: time to properly condition is a brewer's best ally.

off flavours in home brew beer

Decoding Common Off Flavors in Beer

Taste of Green or Rotten Apples: This could indicate the presence of acetaldehyde, which forms early in the fermentation process. Yeast eventually converts this to alcohol. By allowing extended primary fermentation and conditioning for a minimum of three weeks, you can reduce the acetaldehyde content. Ensuring you pitch an adequate amount of yeast can also help in its efficient conversion.


Cheesy Beer: This unwanted taste is likely due to isolaveric acid, a result of oxidized alpha acids in hops. Using fresh hops and proper storage can address this. Also, when using fruits in brewing, ensure they are clean to prevent unwanted bacteria.


The Skunked Beer Mystery: Also known as 'lightstruck' beer, this is caused by UV radiation affecting the iso-alpha acids from hops. Brown glass bottles can help prevent this, but the best solution is to store beer away from direct sunlight and UV lights.


The Wet Cardboard Taste: This stale taste is a sign of over oxygenation. Oxygen is beneficial before primary fermentation but detrimental during and post fermentation. To avoid this, ensure your fermenter is sealed well and the airlock is filled.


The Paint Thinner Aroma: This is attributed to fusel alcohols, often produced when fermentation occurs at high temperatures or when the beer has prolonged contact with trub. Using the right amount of yeast and fermenting at recommended temperatures can help prevent this. I've had this happen once and I can assure you there is not recovering if this has happened to your brew!


Grassy Notes: These could arise from using old malt or grains exposed to moisture. Fresh ingredients and proper storage are crucial. Overhopping or extended dry hopping can also contribute to this flavor.


Cider-like Flavors: Using excessive corn or cane sugar can impart a cider taste to your beer. Consider reducing sugar or using alternatives like honey or malt extract.


Fruity Aromas: Isoamyl acetate, a common ester, can give beer a fruity smell. Proper fermentation temperature and using the right amount of yeast can control its production.


Other Noteworthy Flavors:
  • Tartness: Often due to polyphenols from over-milled and over-steeped grains.
  • Butterscotch: Diacetyl can produce this flavor, influenced by temperature and oxygenation after yeast pitching.
  • Metallic Notes: Usually from non-stainless metal kettles or poor water quality.

While we've touched on many off flavors, there are still more out there. Brewing is a continuous learning process. By adhering to tried-and-tested brewing practices, ensuring cleanliness, using fresh ingredients, and maintaining proper temperatures, you're well on your way to crafting delightful brews. Remember, every mistake is a lesson, and every brew brings you one step closer to perfection. Cheers!

Maximizing Yeast Potential: The Art of Recycling Trub

Thursday, October 26, 2023

Yeast is the unsung hero of the brewing world.

This microscopic powerhouse is the driving force behind fermentation, turning sugars into delicious beer.

But quality yeast doesn't always come cheap.

Enter the world of yeast recycling!

Why Recycling Yeast Makes Sense

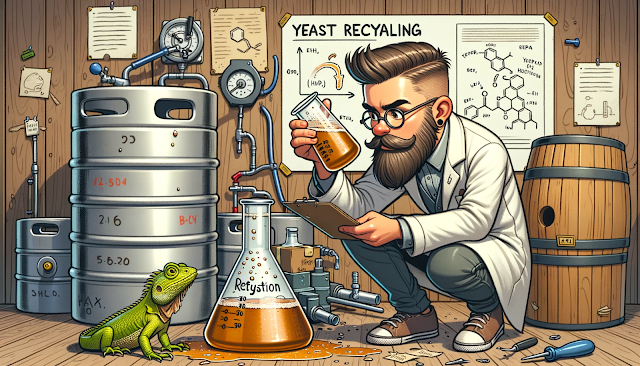
For brewers who are on a tight budget or just environmentally conscious, recycling yeast from the trub presents a golden opportunity. Contrary to the belief of many, the sediment at the bottom of your fermenter is not just waste. Nestled within that layer is a treasure trove of active yeast cells, eager to embark on another fermentation journey.

Commercial breweries have long been in on this secret, consistently repitching yeast to maximize efficiency. So, what's stopping the homebrewer?

recycling yeast trub homebrew beer

The Art of Yeast Washing

Washing yeast isn't about scrubbing them clean. It's a method designed to separate the viable yeast from the other remnants in the trub, primarily spent grains and hop particles.

Steps to Wash Your Yeast:

  • Combine the trub with approximately 1500 ml of sanitized water in a container, preferably something like a conical flask.
  • Allow the mixture to settle. As it does, you'll notice distinct layers forming, with the yeast and water creating a creamy layer above the heavier debris.
  • Carefully pour off this creamy layer into a sanitized container, ensuring you leave the unwanted debris behind.
  • Your freshly "washed" yeast is now ready for cold storage, where it can remain viable for several months.

The No-Wash, Direct Pitch Method

If washing sounds like a chore, there's a simpler route. Once your beer has been transferred out of the fermenter for bottling or kegging, you can:

  • Add sterile water to the remaining trub to liquefy it.
  • Stir this slurry and transfer it into sanitized storage containers.
  • Seal and refrigerate.

When ready to use, if it's within a few weeks, pitch it directly. For older samples, consider rejuvenating them with some fresh wort and a bit of warmth.

Fresh Wort over Trub: A Shortcut?

Indeed, you could just introduce fresh wort directly over the trub. However, repeated cycles will result in a significant buildup of sediment. Thus, it's more efficient if done after a secondary fermentation. A gentle stir ensures the yeast is evenly distributed.

The Perks of Recycling Yeast

Recycling yeast isn't just about saving money. Introducing a larger volume of yeast cells to your wort can kickstart fermentation, leading to a more consistent product with fewer off-flavors or aromas.

The Longevity of Recycled Yeast

The lifespan of recycled yeast varies. Commercial setups often reuse yeast across numerous batches. For homebrewers, the key lies in meticulous sanitation and proper yeast care. The better these practices, the more extended and efficient the yeast's lifecycle.

Conical Fermenters: A Brewer's Best Friend

These unique fermenters simplify the process of accessing and removing trub. Thanks to their design, trub naturally settles at the cone's tip, making collection a breeze.

In conclusion, while yeast recycling requires a bit of extra effort, the rewards in terms of cost savings, efficiency, and beer quality make it a worthy endeavor for any serious homebrewer.

Powered by Blogger.
Back to Top