
For the bottle-conditioning homebrewer, bottling day is a ritual of precision and patience. The final step, adding priming sugar, is perhaps the most critical. It's the action that awakens the dormant yeast for one last job: creating the lively carbonation that will bring your flat, still beer to life. While the traditional method of creating and mixing a priming sugar solution is effective, it's also fraught with potential pitfalls: inaccurate measurements, uneven mixing, and the risk of oxidation.
Carbonation drops are the modern brewer's answer to these challenges. They offer a convenient, precise, and foolproof way to add a measured dose of sugar to each bottle, ensuring consistent carbonation across your entire batch. This guide will explore the science behind these handy pellets, provide a masterclass on how to use them effectively, and offer pro-level tips to perfect your bottle conditioning process.
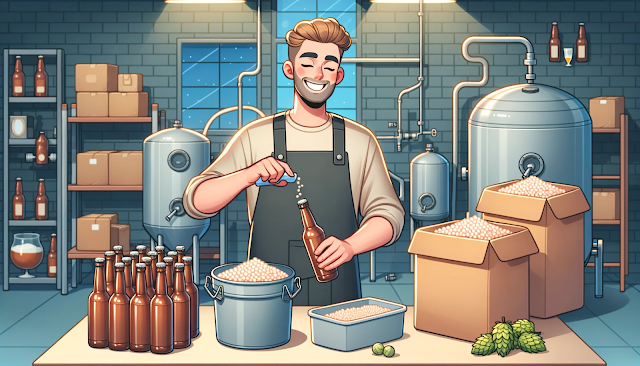
Carbonation drops are pre-measured, hardened pellets made from simple sugars, typically dextrose (corn sugar) and a glucose syrup binder. Their function is rooted in the simple, beautiful science of secondary fermentation.
After your beer has finished its primary fermentation, there is still a small population of healthy, viable yeast cells in suspension. When you add a carbonation drop to a sealed bottle, it slowly dissolves, providing a new, measured food source for this residual yeast. The yeast consumes the sugar and, through anaerobic respiration, produces two key byproducts: a tiny amount of additional alcohol and, crucially, carbon dioxide (CO2). With nowhere to escape, this CO2 dissolves into the beer, creating the carbonation we know and love.
Why Choose Drops Over Bulk Priming?
- Unbeatable Consistency: By removing all measurement error, drops ensure every single bottle carbonates to the exact same level. This eliminates the risk of some bottles being flat while others are gushers.
- Simplicity and Speed: The process of accurately weighing, boiling, cooling, and gently mixing a priming sugar solution is eliminated. Bottling day becomes faster, simpler, and less stressful.
- Reduced Risk of Oxidation: Bulk priming requires transferring your finished beer into a separate bottling bucket to mix in the sugar solution. This extra step introduces a major risk of splashing and oxidizing your beer, which can lead to stale, cardboard-like off-flavors. Drops allow you to bottle directly from your primary fermenter, minimizing this risk.
Step-by-Step Guide to Perfect Carbonation
- Ensure Fermentation is Complete: Before bottling, you must be 100% certain that primary fermentation has finished. Use your hydrometer to take a gravity reading. Wait two more days and take another. If the reading is identical, your yeast has consumed all available sugars and it is safe to bottle.
- Clean and Sanitize Everything: This is the golden rule. Thoroughly clean and then sanitize all of your bottles, caps, bottling wand, and tubing. Any microbial contamination at this stage will spoil your beer during the conditioning period.
- Add the Drops: Just before filling, place the carbonation drops into each sanitized bottle. Handle them with clean hands or gloves to avoid contamination. The standard dosage is calibrated for a moderate carbonation level (around 2.4 volumes of CO2):
- One drop for a standard 12 oz (355 ml) bottle.
- Two drops for a 22 oz (650 ml) "bomber" or 750 ml bottle.
- Fill Your Bottles: Attach your bottling wand to your sanitized siphon and begin filling the bottles. Fill each bottle from the bottom up to minimize splashing and oxidation, leaving about one inch of headspace at the top. This headspace is crucial for allowing a proper pressure seal to form.
- Cap the Bottles: Immediately after filling, place a sanitized cap on each bottle and seal it securely with a reliable bottle capper. A good seal is essential to trap the CO2 produced during conditioning.
- Condition with Patience: Store the bottles upright in a dark place at room temperature (around 68-72°F or 20-22°C) for at least two weeks. During this time, the yeast will slowly consume the sugar from the drops and carbonate the beer.
- Test and Chill: After two weeks, place one bottle in the fridge for at least 24 hours to allow the CO2 to fully dissolve into the cold liquid. Open it to test the carbonation level. If it's perfect, your batch is ready. If it's still a bit flat, give the rest of the bottles another week to condition.
The Limitation: Lack of Precision
While drops offer consistency, they lack precision. You cannot easily adjust the carbonation level for different beer styles. A Belgian Tripel requires a much higher carbonation level than an English Mild Ale. If you want to precisely target a specific carbonation volume (e.g., 2.8 volumes of CO2), you must return to the traditional method of using an online priming sugar calculator and bulk priming.
- Dealing with High Gravity or Lagers: If you've brewed a very high alcohol beer or have lagered your beer for a long time, the yeast population may be low or sluggish. In these cases, it's wise to add a small amount of fresh, healthy rehydrated yeast at bottling time (such as CBC-1 Cask and Bottle Conditioning Yeast) to ensure a successful secondary fermentation.
- Avoid Over-carbonation: The number one rule is to never bottle before fermentation is complete. Adding drops to a beer that still contains residual fermentable sugar is a recipe for "bottle bombs," a dangerous situation where excess pressure can cause bottles to shatter. Always trust your hydrometer, not your airlock.
- Storage is Key: Store your carbonation drops in a cool, dry place and in a sealed container. Exposure to humidity can make them sticky and difficult to use.

Carbonation drops offer homebrewers an incredibly easy and reliable method for priming beer bottles. For brewers who prioritize convenience and consistency over precise stylistic control, they are an unbeatable tool. They simplify bottling day, reduce the risk of oxidation, and ensure that every bottle you open has the perfect level of fizz.
As with any brewing process, cleanliness, patience, and attention to detail are crucial. Enjoy the satisfying sparkle that these simple drops bring to your delicious homebrewed creations!


