How to use Camden Tablets when Homebrewing Cider

Wednesday, October 8, 2025

In the alchemy of brewing, few elements are as misunderstood or as critically important as oxygen. 

It is the Janus-faced god of fermentation: a vital, life-giving force in the opening moments, and a stale, flavor-destroying poison at nearly every other stage. Mastering the art of brewing is, in many ways, the art of mastering oxygen: knowing precisely when to introduce it, and when to fight relentlessly to keep it out. 

An amateur brewer makes wort; a master brewer manages oxygen.

This guide is your complete manual to this crucial variable. We will dive deep into the biochemistry of yeast respiration, explore the devastating chemical pathways of oxidation, and provide a comprehensive playbook of techniques, from simple splashing to pure oxygen injection. 

When BEER WORT aeration is good but oxygenation is bad

The Friend: Oxygen's Vital Role Before Fermentation

For a brief, critical window after you've chilled your wort but before active fermentation begins, oxygen is your yeast's most important nutrient. T

his is the only time your yeast performs aerobic respiration, a process essential for building a strong and healthy army for the battle ahead.

Biochemistry in the Brewhouse: The Lag Phase

When you pitch yeast into cooled wort, it enters the "lag phase." During this period, it is not producing alcohol. Instead, it is focused on reproduction and building up its health. The dissolved oxygen (DO) you introduce is the critical fuel for this phase, as the yeast uses it to synthesize essential compounds for its cell membranes:

  • Sterols and Unsaturated Fatty Acids: These are the literal building blocks of strong, flexible, and healthy yeast cell walls. A robust cell membrane allows the yeast to properly manage nutrient transport, expel waste products (like alcohol), and, crucially, to tolerate the increasingly toxic, high-alcohol environment as fermentation progresses. Think of it as giving your soldiers proper armor before sending them into battle.
  • Yeast Reproduction: With strong cell walls, the yeast can bud and multiply effectively, often quadrupling its population. Building a large, healthy colony is the key to fermenting the wort quickly and cleanly. Insufficient oxygen leads to a smaller, weaker yeast population that struggles, resulting in slow or "stuck" fermentations and the production of off-flavors like acetaldehyde (green apple) and fusel alcohols (hot, solvent-like).

Brewer's Insight: The High-Gravity Connection

The higher the Original Gravity (and thus the potential ABV) of your beer, the more critical proper aeration becomes. Alcohol is toxic to yeast, and a strong cell membrane is its only defense. 


For high-gravity beers like Imperial Stouts or Barleywines, a target of 12-15+ ppm of dissolved oxygen is essential for ensuring the yeast can survive the high-alcohol environment and fully attenuate the beer, preventing a cloyingly sweet final product.

The Foe: The Dangers of Oxygen at the Wrong Time

Once fermentation begins and your yeast switches to anaerobic (oxygen-free) respiration, oxygen switches from friend to mortal enemy.

 Any introduction of oxygen from this point forward is known as oxidation, a cascade of chemical reactions that will permanently and irreversibly damage your finished beer.

Hot-Side Aeration (HSA): The Cardboard Time-Bomb

This occurs if you splash or agitate your wort while it is still hot (above 80°F or 27°C), such as during the transfer from the kettle to the fermenter before it's fully chilled. At high temperatures, oxygen eagerly binds with lipids and melanoidins in the wort, creating unstable compounds. 

Over weeks or months of storage, these compounds break down and create trans-2-nonenal, the specific chemical that produces the unmistakable stale, papery, or "wet cardboard" flavor in beer. 

The damage is a time-bomb set on brew day that only goes off in the finished package.

Post-Fermentation Oxidation: The Flavor Thief

Introducing oxygen after fermentation is even more immediately damaging. The protective layer of CO2 created by the yeast is gone, and the delicate flavor and aroma compounds you've spent weeks cultivating are left exposed. 

This leads to a rapid staling of the beer, manifesting in several ways:

  • Muted Hop Aroma: The first casualty. The volatile compounds from your expensive whirlpool and dry hop additions are fragile and are quickly destroyed by oxygen, leaving your IPA smelling dull and malty.
  • Development of Off-Flavors: Oxidation creates sweet, sherry-like, nutty, or honey-like flavors that are inappropriate for most styles. Rich malt flavors turn into a cloying, dull sweetness.
  • Visual Changes: Oxygen can cause browning of the beer's color and contribute to permanent haze as polyphenols bind together.
The Brewer's Playbook: Mastering Aeration & Oxygen Avoidance

The golden rule is simple: Aerate vigorously when the wort is cold, and avoid it obsessively at all other times.

Low-Tech Aeration Methods ("Good")

These methods aim to saturate your wort with oxygen from the atmosphere, which has a theoretical maximum of about 8 ppm (parts per million) in standard gravity wort.

  • Vigorous Shaking: Seal your fermenter and shake it like crazy for 5 minutes. It's effective but physically demanding and less repeatable than other methods.
  • Splashing/Cascading: As you transfer your chilled wort from your kettle to your fermenter, let it splash! This is a simple and effective way to incorporate air.
  • Whisking: Use a large, sanitized stainless steel whisk to vigorously whip the surface of your cold wort for 5-10 minutes. This creates a vortex and effectively introduces a good amount of oxygen.

High-Tech Aeration Methods ("Better" and "Best")

  • Aeration Stone with a Pump ("Better"): Using an aquarium-style pump with a sanitized diffusion stone (0.5-2 micron) can achieve 8-10 ppm. Crucially, you must place a sanitary 0.2 micron inline filter between the pump and the stone. Failure to do so turns your pump into a microbe cannon, injecting airborne contaminants directly into your wort.
  • Pure Oxygen Injection ("Best"): This is the most effective and efficient method. Using a small tank of pure oxygen, a regulator, and a diffusion stone, you can fully saturate your wort with 12-15+ ppm of dissolved oxygen in as little as 60-90 seconds. This is the gold standard for high-gravity brewing and ensuring clean, fast fermentations every time.

Pro-Tip: Avoiding Post-Fermentation Oxidation

Once fermentation starts, your new mantra is "no splashing." 


Use an auto-siphon for all transfers and keep the end of the tubing below the surface of the liquid you're transferring into. 


For ultimate protection, learn to perform closed transfers, using CO2 pressure to move beer from one sanitized, purged vessel (like a carboy) to another (like a keg) without it ever touching the air.

While fermentation will still occur without proactive aeration, understanding and managing oxygen is a hallmark of a skilled brewer. 

By providing your yeast with the oxygen it needs during the lag phase, you promote a strong, healthy fermentation that leads to cleaner flavors and better attenuation. 

And by diligently protecting your beer from oxygen at all other times, you preserve its delicate aromas and ensure its long-term stability.

Treat oxygen as the powerful tool it is, a friend to your yeast, a foe to your finished beer, and you will unlock a new level of control and consistency in your brewing journey.

How to Carbonate Home Brewed Beer

Tuesday, October 7, 2025

There's no feeling quite like it: the satisfying psst as you open a bottle of your own homebrew, the gentle hiss as you pour it into a glass, and the sight of a perfect, stable head crowning your creation. That fizz, that sparkle, that lively tingle on your tongue - that's carbonation.

And getting it right is what separates good homebrew from great homebrew.

For many brewers, this final step is a black box filled with anxiety.

Will it be flat?

Will I create dangerous "bottle bombs"?

How do I even start with kegging?

Relax.

This guide will demystify the entire process. We'll explore the science of how beer gets its bubbles, then walk you through the two primary methods: the classic art of bottle conditioning and the powerful upgrade of kegging. By the end, you'll have the confidence to achieve perfect carbonation, every single time.

how to carbonate home brew beer

The Two Paths to Carbonation

Kegging vs. Bottle Conditioning: A Quick Comparison

Feature Bottle Conditioning Kegging (Force Carbonation)
Time to Drink2-4 weeks24 hours to 1 week
Initial CostLowHigh
EffortHigh on bottling dayLow
ConsistencyVariableVery Consistent
ClarityYeast sediment presentCrystal-clear possible
PortabilityExcellentChallenging

The Science of Fizz: What is Carbonation?

Getting CO2 into your beer is a dance between temperature and pressure, governed by a scientific principle called Henry's Law. In simple terms, it states that the amount of a gas (like CO2) that can dissolve in a liquid (like beer) is directly proportional to the pressure of that gas over the liquid.

 Colder liquids can also hold more dissolved gas.

We measure carbonation in "Volumes of CO2." One volume of CO2 is one liter of carbon dioxide gas dissolved in one liter of beer. Different beer styles have different target carbonation levels:

  • British Ales (Cask Ale): 1.5 - 2.0 Vols
  • American Pale Ales & IPAs: 2.2 - 2.7 Vols
  • German Wheat Beers (Hefeweizen): 3.5 - 4.5 Vols
Method 1: The Classic Art of Bottle Conditioning

This is the traditional, time-honoured way to carbonate beer. It’s how every homebrewer starts, and it’s a craft in its own right.

beer bottling day guide

Step-by-Step Guide to Bottling Day

You can either prime your wort with sugar or use carbonation drops.
  1. Ensure Fermentation is Complete: Use your hydrometer to take a gravity reading. Wait two days and take another. If the reading is identical, your yeast is done, preventing the risk of "bottle bombs."
  2. Calculate Your Priming Sugar: Use a reliable online priming sugar calculator. You'll need your exact batch volume, the highest fermentation temperature, and your target CO2 volume.
  3. Prepare the Sugar Solution: Boil your calculated priming sugar in a cup of water for 5 minutes. This sanitizes it and ensures it will mix evenly into your beer.
  4. Transfer and Mix: Gently pour the cooled sugar solution into a sanitized bottling bucket. Carefully rack your beer on top, allowing the motion to mix everything without splashing.
  5. Fill and Cap: Using a bottling wand, fill your sanitized bottles to about an inch from the top to leave crucial headspace. Cap each one securely.
  6. Wait: Store the bottles in a dark place at room temperature (around 20-22°C / 68-72°F) for at least two weeks for the yeast to naturally carbonate the beer.

Pros of Bottle Conditioning

  • Inexpensive Start: Requires minimal equipment beyond what comes in a starter kit.
  • Highly Portable: It's easy to grab a few bottles to share with friends.
  • Flavor Maturation: Bottle conditioning allows certain beer styles to develop complex flavors over time.

Cons of Bottle Conditioning

  • Time-Consuming: Cleaning, filling, and capping 50 bottles is a significant chore.
  • Yeast Sediment: A layer of yeast (lees) is unavoidable at the bottom of each bottle.
  • Inconsistent Carbonation: It's easy to get slightly different carbonation levels from bottle to bottle.

The Science of Bottle Conditioning

Inside each sealed bottle, a mini-fermentation occurs. The dormant yeast consumes the priming sugar and produces CO2.

With nowhere to go, this gas is forced to dissolve into the beer, creating natural carbonation.

Method 2: The Upgrade to Kegging

Force carbonating is the fast lane to finished beer. By using a tank of CO2, you take direct control of the process, bypassing the yeast entirely.

kegging homebrew beer guide

How to Force Carbonate

There are two primary methods for force carbonating:

  1. The "Set and Forget" Method (1-2 Weeks): This is the easiest and most reliable way. Chill your keg, connect the gas, and set the regulator to your target pressure based on a carbonation chart (below). The beer will slowly absorb the CO2 over a week or two.
  2. The "Burst Carbonate" Method (24-48 Hours): For the impatient brewer. Chill your keg, then apply a much higher pressure (e.g., 30-40 PSI) for 12-24 hours. After this period, you must vent the excess pressure and turn the regulator down to your target serving pressure (usually 10-12 PSI).

Pros of Kegging

  • Extremely Fast: Go from fermented beer to a carbonated pint in as little as 24 hours.
  • Precise Control: You can dial in the exact carbonation level for any beer style.
  • No Sediment: Beer served from a keg is crystal clear, with no yeast at the bottom of your glass.

Cons of Kegging

  • High Initial Cost: Kegs, a CO2 tank, regulator, and a fridge or kegerator are a significant investment.
  • Requires Space: You need a dedicated fridge or chest freezer for your keg setup.
  • Potential for Gas Leaks: A poorly sealed connection can drain your CO2 tank overnight.

Force Carbonation Chart (PSI)

Use this chart for the "Set and Forget" method. Find your kegerator's temperature and your target CO2 volume to determine the correct PSI setting.

Temp (°F/°C) 2.2 Vols 2.4 Vols 2.6 Vols
38°F / 3°C9.411.714.1
40°F / 4°C10.312.715.1
42°F / 6°C11.213.716.2
Frequently Asked Questions

beer carbonation science explained

How long should I store my bottle-conditioned beer before drinking?

The baseline is two weeks at room temperature for the yeast to carbonate, followed by at least 48 hours in the fridge.

Many beers, especially bigger, darker styles, will continue to mature and improve in the bottle for months.

Can I re-carbonate flat beer?

In bottles, it's very difficult. In a keg, however, it's incredibly easy! Simply reconnect your gas line, check for leaks, and re-apply pressure using the "Set and Forget" method.

What's the best way to store my carbonated homebrew?

Once carbonation + conditioning is complete, cold is king. Store all your beer, whether in bottles or a keg, in a cool place - or even the refrigerator to preserve the fresh flavours and slow down staling.

What is this layer of gunk at the bottom of my bottle?

That is the yeast sediment, or "lees," and it's a completely normal part of bottle conditioning. Pour carefully into a glass, leaving the last half-inch of liquid and the yeast behind in the bottle.

Help, my bottles are gushing foam! How do I fix over-carbonation?

This is usually caused by too much priming sugar or bottling before fermentation was finished. Get all the bottles into the fridge immediately. To salvage the beer, carefully open each bottle to vent some pressure before re-capping it. You may need to do this a few times over a few days.

It could also be an infected beer batch. You'll need to do a taste and smell test.

Can I use table sugar or honey to prime my beer?

Yes, but be precise. Table sugar (sucrose) is slightly more fermentable than corn sugar (dextrose), so you'll need about 10% less. Honey and maple syrup also work but can add their own flavours and can give the beer a drier taste / mouthfeel. For consistent results, sticking to dextrose is recommended for beginners.

Beer Kit Brewer: Beginner's Guide to Brewing Beer from a Kit

Monday, October 6, 2025

Welcome to the world of homebrewing! You're about to turn water, grain, hops, and yeast into something magical. T

his guide is your trusted co-pilot, designed to walk you through your inaugural batch of beer using a simple, no-boil beer kit

We're going to skip the complex, all-grain science for now and focus on the fundamental skills that will guarantee a delicious, successful first brew.

Think of this as Brewing 101. Follow these steps, embrace the process, and you'll be enjoying your very own handcrafted beer in just a few weeks. Let's get that first brew bottled!

beer kit brew guide

Part 1: The Foundation — Preparation & The Golden Rule

The Golden Rule: You Are a Janitor First, a Brewer Second

This is the most important lesson in all of brewing. Your sugary wort is a perfect petri dish for microscopic invaders - wild yeast and bacteria - that will turn your beer sour and undrinkable. 

You are not just brewing beer; you are creating a pristine environment where only your chosen yeast can thrive. 

In brewing, cleanliness is not just a virtue; it is a necessity.

The Science of Sanitation

It's crucial to understand the difference: Cleaning removes visible dirt and grime (soil). Sanitizing eliminates invisible microorganisms. You must clean your equipment thoroughly before you sanitize it. 

Use a no-rinse sanitizer like Star San

It works by creating a highly acidic environment that ruptures the cell walls of bacteria and wild yeast, killing them on contact. 

If a piece of equipment touches your beer after the boil, it must be sanitized. No exceptions. You do not want to brew an infected beer

The tears this author has spilt over dumped batches could fill a keg.

Part 2: Brew Day — From Can to Fermenter

The Brewer's Protocol: A Step-by-Step Guide

This is the moment! Read your specific kit's instructions, but the process is generally universal. Let's begin.

Beer Kit Brewer: Beginner's Guide to Brewing Beer from a Kit
  1. Prepare the Malt Extract: The thick malt extract in the can is easier to pour when warm. Place the unopened can in a sink of hot water for 10-15 minutes. This lowers its viscosity, ensuring you get every last drop of sugary goodness.
  2. Mix the Wort: Pour about 2 gallons of hot (not boiling) water into your sanitized fermenter. Open the can of malt extract and pour it in. Use a sanitized spatula to scrape the can clean. Add any additional sugars your kit recommends (like dextrose or dry malt extract). Stir vigorously with your sanitized long spoon until all the extract and sugars are completely dissolved. This sugar-rich liquid is now called "wort."
  3. Top Up and Aerate: Add cold, fresh water to the fermenter until you reach your target volume (usually 5 gallons or 23 liters). As you add the final gallon, let it splash! This is the ONE time you want to introduce oxygen into your beer. Yeast needs oxygen for its initial growth phase to build healthy cell walls.
  4. Check Temperature & Pitch Yeast: Use your sanitized thermometer to check the wort's temperature. It MUST be between 65-75°F (18-24°C). If it's too warm, wait. Pitching yeast into hot wort will kill it. Once in the correct range, open your yeast packet and sprinkle it evenly across the surface of the wort.
  5. Seal and Store: Securely fasten the lid on your fermenter. Insert your airlock (filled to the line with sanitizer) into the rubber stopper. Place the fermenter in a dark place that maintains a stable temperature, like a closet or basement.
Part 3: The Magic of Fermentation

Patience is a Virtue: Let the Yeast Do the Work

brewers guide to beer kit cans 101

For the next 1-2 weeks, your job is to be a patient observer. Within 24-72 hours, you'll see signs of fermentation: vigorous bubbling in the airlock and a thick, frothy layer called a krausen on top of your beer.

The Science of Fermentation

Inside that dark bucket, a metabolic miracle is occurring. The yeast cells are consuming the simple sugars (glucose, maltose) in your wort. 

Through an anaerobic process, they convert each sugar molecule into two molecules of ethanol (alcohol) and two molecules of carbon dioxide (the bubbles). 

At the same time, they produce a symphony of other compounds, primarily esters, which contribute the fruity or spicy notes that define an ale.

 Temperature control is key here; a stable 68°F (20°C) will result in a clean fermentation with balanced flavors.

Confirming Completion: Trust the Hydrometer, Not the Bubbles

After about a week, the bubbling will slow down or stop. This DOES NOT mean it's finished. The only way to know for sure is to take a gravity reading with your hydrometer. 

Take a reading. 

Wait two days. 

Take another. 

If the reading is stable, fermentation is complete.

Part 4: The Final Step — Bottling and Conditioning

Creating Carbonation and Maturing Your Beer

  1. Sanitize Everything Again: Bottles, caps, siphon, bottling wand—everything.
  2. Prime Your Beer: To carbonate your beer, you need to add a small, measured amount of sugar. Boil about 2/3 cup of corn sugar (dextrose) in two cups of water. Gently add this cooled syrup to your sanitized bottling bucket.
  3. Transfer and Fill: Carefully siphon the beer from the fermenter into the bottling bucket, leaving the sediment behind. The gentle motion will mix the sugar. Attach your bottling wand and fill each bottle, leaving about one inch of headspace.
  4. Cap and Condition: Cap each bottle securely. Store the bottles in a dark place at room temperature for at least two weeks.

The Science of Bottle Conditioning

Inside each sealed bottle, a mini-fermentation occurs. The dormant yeast wakes up, consumes the priming sugar, and produces a small amount of CO2. 

With nowhere to go, this CO2 is forced to dissolve into the beer, creating carbonation. 

This conditioning period is also crucial for flavor maturation, allowing harsh notes to mellow and complex flavors to meld together.

The Reward

Finally, the moment you've been waiting for. After at least two weeks, chill a bottle thoroughly in the fridge. 

Pour it into a proper glass (you've earned it!) and savor the fruits of your labor. 

Pay attention to the aroma, the creamy head, and the taste. Each element is a testament to the care you've invested. 

It might not be perfect, but it's yours. 

The Ultimate Guide to Yeast Nutrients for brewing beers

Yeast is a remarkable microorganism, the microscopic workhorse that transforms sugary wort into glorious beer. 

For centuries, brewers relied on instinct and tradition, unknowingly providing for their yeast. 

It wasn't until the pioneering work of scientists like Louis Pasteur that we began to understand fermentation not as a mystical event, but as a biological process driven by a living organism with specific needs.

use yeast nutrients making beer wort

While factors like temperature and pH are often discussed, the specific nutritional needs of yeast can be overlooked

This guide will delve into the vital science of yeast nutrition, transforming your understanding from simply pitching yeast to actively managing its health for a better, cleaner, and more consistent fermentation every time.

Part 1: The Science of a Healthy Cell

What Yeast Craves (Beyond Sugar)

An all-malt wort is a fantastic food source, but it isn't always perfect. For yeast to not just survive but thrive, it needs more than just sugar. 

It requires a balanced diet of micronutrients to build healthy cell walls, reproduce efficiently, and cleanly metabolize sugar into alcohol without producing unwanted off-flavors.

The Brewer's Micronutrient Checklist:

  • Nitrogen (FAN): The most critical nutrient. Yeast needs Free Amino Nitrogen (FAN) to synthesize proteins and build new cells. A standard all-malt wort usually has plenty, but worts with high amounts of sugar adjuncts do not.
  • Minerals (Especially Zinc): Zinc is a vital cofactor for key enzymes, including alcohol dehydrogenase, which performs the final step of alcohol production. A lack of zinc can lead to sluggish or stalled fermentations. Magnesium is also crucial for cellular metabolism.
  • Vitamins: B-complex vitamins like biotin and pantothenic acid are essential for healthy cell growth and metabolism.
  • Sterols and Unsaturated Fatty Acids: These are the building blocks of the yeast cell membrane. A strong, pliable membrane is crucial for stress tolerance (especially to alcohol) and proper cell function.

When yeast is stressed due to a lack of these key nutrients, it produces more undesirable compounds like fusel alcohols (hot, solvent-like flavors) and acetaldehyde (a cidery, green-apple flavor), leading to a flawed beer.

Part 2: The Brewer's Diagnostic — When to Use Nutrients

Identifying a Nutrient-Deficient Wort

For many standard-gravity, all-malt beers, adding extra nutrients is not necessary. The malt provides a rich diet. 

However, in certain high-stress situations, nutrients become an essential tool for ensuring a clean and complete fermentation.

Use Nutrients When:

  • Making High-Gravity Beers: A wort with a starting gravity above 1.060 is a high-stress environment. The high sugar concentration (osmotic pressure) and eventual high alcohol level are tough on yeast. Nutrients help build a larger, healthier yeast population that can handle the stress.
  • Using High Proportions of Adjuncts: If your recipe includes a large amount (over 20%) of non-malt sugar sources like corn sugar, table sugar, or honey, you are diluting the wort's nutrient content. These simple sugars provide no FAN or minerals, effectively starving your yeast.
  • Making Yeast Starters: Adding a small amount of nutrient to your yeast starter gives your yeast a perfect environment to build up its population and store the vital compounds it needs for a healthy fermentation in the main batch.
  • Brewing Seltzers, Meads, or Ciders: These fermentations are almost entirely devoid of the nutrients found in malt. For these beverages, yeast nutrient is not just beneficial; it is essential for a successful fermentation.
Part 3: The Brewer's Protocol — Your Guide to Application

Choosing and Using Your Nutrients

There are several types of yeast nutrients available, each with a specific purpose.

Nutrient Types:

  • Simple Nutrients (DAP): Products like di-ammonium phosphate are simple nitrogen supplements. They are effective at providing basic fuel for yeast reproduction.
  • Complex Nutrients: Blends like Fermax or Fermaid K are a brewer's best friend. They contain a balanced mix of nitrogen, amino acids, vitamins, and minerals, providing a complete diet for your yeast.
  • Specialized Nutrients (e.g., Servomyces): Produced by White Labs, Servomyces is a unique product made from yeast that has been enriched with zinc. It provides this critical mineral in a highly bioavailable form, ensuring it gets directly to the yeast cells without any risk of toxicity.

Application Protocol: Timing is Everything

For best results, add your yeast nutrient during the boil.

The Golden Rule: Add 1 teaspoon of a complex yeast nutrient per 5 gallons of wort during the last 10-15 minutes of the boil. This ensures the nutrient is fully dissolved and sanitized before fermentation begins. 

For a product like Servomyces, one capsule added at 10 minutes is all that's needed. If you are brewing a kit beer with no boil, you can add the nutrient directly to the fermenter and stir vigorously to dissolve it before pitching your yeast.

From Brewer to Yeast Rancher

Yeast nutrition might seem like a small detail, but its impact on your final beer is immense. 

By moving beyond just providing sugar and starting to manage the health of your yeast culture, you elevate your brewing from a simple process to a true craft. 

You become a yeast rancher, cultivating a healthy herd to do its best work. 

Whether you're pushing the limits with a high-gravity monster or ensuring a clean ferment in a simple pale ale, understanding the nutritional needs of yeast is a powerful tool in your quest for the perfect pint.

Beerstone: How to remove and prevent it from occuring

Tuesday, September 30, 2025

Every brewer, whether amateur or professional, is well-acquainted with the challenges that come with maintaining brewing equipment. One such challenge is the pesky formation of beerstone. This stubborn substance can compromise the quality of the brew and pose sanitation issues. Let's delve deep into understanding beerstone and provide effective methods to eliminate it from brewing equipment.


'calcium oxalate' - beerstone buildup


What is Beerstone? A Deeper Dive into the Science

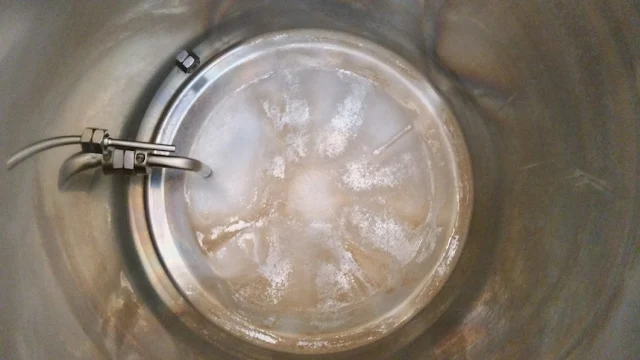
Beerstone, scientifically known as calcium oxalate, is a milky-white or sometimes brownish deposit that forms on brewing equipment over time. It's a combination of minerals, primarily calcium and magnesium salts, and organic compounds left over from the brewing process. If left untreated, beerstone can harbor microorganisms, jeopardizing the quality and safety of the brew.


The formation of beerstone is a classic example of precipitation chemistry. Oxalic acid, naturally present in malt, reacts with calcium ions found in the brewing water and the malt itself. This reaction forms calcium oxalate, a salt with very low solubility in water, especially under certain conditions. The chemical equation for this reaction is: $Ca^{2+}(aq) + C_{2}O_{4}^{2-}(aq) \rightarrow CaC_{2}O_{4}(s)$. The presence of proteins and other organic molecules in the wort acts as a "binder," helping the calcium oxalate crystals adhere to surfaces and creating a tenacious, difficult-to-remove scale.


Several factors can influence the rate of beerstone formation:

  • Water Chemistry: Hard water, with its higher concentration of calcium and magnesium ions, is more prone to beerstone formation.
  • Mash pH: The pH of the mash and wort can affect the solubility of calcium oxalate.
  • Temperature: Temperature fluctuations during the brewing process, especially the rapid cooling of the wort, can cause calcium oxalate to precipitate out of solution.


Why is Beerstone a Concern for Brewers?

Beerstone is more than just an aesthetic issue; it's a serious concern for any brewer who values quality, consistency, and safety. Here's a more in-depth look at the problems it can cause:


  • Sanitation Issues: The rough, porous surface of beerstone provides an ideal breeding ground for bacteria and wild yeast. These unwanted microorganisms can hide in the microscopic nooks and crannies of the beerstone, protected from routine cleaning and sanitizing procedures. This can lead to cross-contamination between batches, resulting in off-flavors, spoilage, and even potential health risks.
  • Equipment Integrity: Over time, beerstone can cause significant damage to your brewing equipment. The buildup of this scale can lead to pitting and corrosion of stainless steel surfaces, reducing the lifespan of your expensive tanks, kettles, and other equipment.
  • Inconsistent Brews: The presence of beerstone can interfere with the brewing process in several ways. It can act as a nucleation site, causing excessive foaming and gushing in the finished beer. It can also alter the flavor profile of your beer, leading to inconsistent batches and a product that doesn't meet your standards.


Effective Methods to Remove Beerstone: A Brewer's Guide

While beerstone can be a stubborn foe, it's not invincible. With the right knowledge and a consistent cleaning regimen, you can keep your equipment pristine and your beer delicious. Here's a step-by-step guide to effective beerstone removal:


1. Routine Cleaning: The First Line of Defense

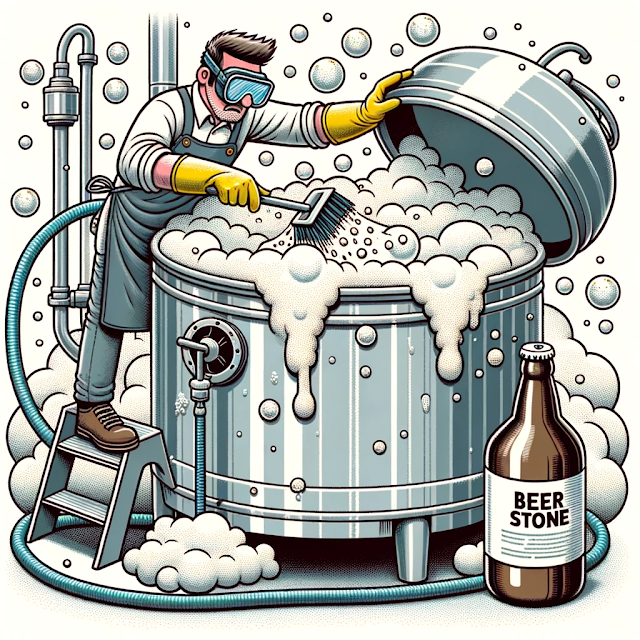
The best way to deal with beerstone is to prevent it from building up in the first place. A thorough cleaning after every brew is essential. Use a high-quality, brewery-approved alkaline cleaner to remove organic soils like proteins and hop resins. Scrub all surfaces with a non-abrasive pad, paying close attention to hard-to-reach areas. This will remove the "binder" that helps beerstone adhere to surfaces.


2. The Power of Acids: Dissolving the Mineral Scale

For existing beerstone buildup, an acidic cleaner is your best weapon. Phosphoric acid and nitric acid are both highly effective at dissolving the calcium oxalate that makes up the bulk of beerstone. These acids work by breaking down the mineral scale and allowing it to be easily rinsed away. When using acidic cleaners, always follow the manufacturer's instructions for dilution and contact time. Be sure to wear appropriate personal protective equipment (PPE), including gloves and eye protection, as these acids can be corrosive.


3. Specialized Beerstone Removers: A Targeted Approach

For tough, built-up beerstone, a specialized beerstone remover may be necessary. These products are formulated with a blend of acids, surfactants, and chelating agents that work together to break down and remove even the most stubborn deposits. They are often designed for specific applications, such as cleaning-in-place (CIP) systems, and can be a valuable tool in any brewer's arsenal.


4. Prevention is Key: Keeping Beerstone at Bay

Once your equipment is free of beerstone, you'll want to keep it that way. Here are some preventative measures you can take:

  • Water Treatment: If you have hard water, consider using a water softener or reverse osmosis (RO) system to reduce the mineral content of your brewing water.
  • Regular Acid Washing: Incorporate a regular acid wash into your cleaning regimen. This will help to prevent the buildup of beerstone and keep your equipment in top condition.
  • Passivation: After cleaning with an acidic cleaner, it's a good idea to passivate your stainless steel equipment. This process creates a protective layer on the surface of the steel that helps to prevent corrosion and beerstone formation.


beerstone removal techniques


Safety First: A Brewer's Responsibility

When using chemical agents to clean brewing equipment, it's paramount to prioritize safety. Always:


  • Wear protective gloves and eyewear.
  • Ensure adequate ventilation in the cleaning area.
  • Thoroughly rinse equipment after cleaning to remove any residual chemicals.
  • Store cleaning agents out of reach of children and pets.


Conclusion: A Clean Brewery is a Successful Brewery

Beerstone is an inevitable challenge faced by brewers. However, with consistent cleaning, preventive measures, and the right cleaning agents, it's a challenge that can be efficiently tackled. By keeping brewing equipment free of beerstone, brewers can ensure the production of high-quality, consistent, and safe brews. Remember, a clean brewery is a successful brewery. Happy brewing!

Cold Crashing homebrew beer: How to Guide

The Brewer's Guide to Cold Crashing: Science, Steps, and Secrets

Cold crashing has become a staple in the toolkit of experienced homebrewers, and for good reason.


It’s a simple, effective method that elevates your beer’s clarity and smoothness, ensuring that what’s in your glass is as clean and refined as possible.


Whether you’re brewing a crisp lager or a hazy IPA, cold crashing can be the finishing touch that takes your homebrew to the next level.


Why Cold Crashing Matters: The Science of Clarity ๐Ÿบ

Cold crashing is more than just a way to make your beer look better; it’s about improving flavor and mouthfeel.


By dropping the temperature post-fermentation, you leverage scientific principles to clarify your brew.


The process encourages unwanted yeast, hop particles, proteins, and other suspended matter to drop out of suspension and settle at the bottom of the fermenter.


This phenomenon is governed by Stokes' Law, which dictates how quickly a particle falls through a liquid.


The key takeaway is that larger, denser particles fall much faster.


Cooling the beer causes yeast cells to cease activity and clump together in a process called flocculation.


These larger clumps, along with hop matter, settle significantly faster than individual particles would.


Furthermore, cold crashing is the best weapon against chill haze.


This is a temporary cloudiness that appears when beer is cooled for serving, caused by proteins and polyphenols forming weak bonds.


By crashing the temperature before packaging, you force these bonds to form and precipitate out early, resulting in a beer that remains brilliantly clear even when ice-cold.


This results in a beer that’s not only clearer but also smoother, with fewer harsh or yeasty flavours.

Essential Gear for a Successful Cold Crash ๐Ÿป

To cold crash your beer properly, you’ll need a few key pieces of equipment:


  • A Sealed Fermentation Vessel: Your fermenter must be able to be sealed airtight to prevent oxygen contamination.
  • Temperature Control: A refrigerator or chest freezer with an external temperature controller is essential.

    The goal is to maintain a stable, cold temperature just above freezing without turning your beer into an ice block.
  • Thermometer: An accurate digital thermometer or a temperature strip on your fermenter is crucial for monitoring the process.
  • Sanitization Tools: As always in brewing, cleanliness is paramount.

    Ensure you have sanitizer ready for any equipment that might contact your beer.

    Properly sanitized gear is your best defense against infection.


The Cold Crashing Process: A Step-by-Step Guide

With your gear ready, here is how to execute the perfect cold crash:


1. Ensure Fermentation Is Complete: Cold crashing before fermentation is finished can cause yeast to go dormant prematurely, leaving you with a sweet, under-attenuated beer.

Use a hydrometer to confirm your specific gravity has been stable for at least two consecutive days.


2. Set the Temperature: Dial in your temperature controller to a range between 0-4°C (32-40°F).

Lagers and crisp pilsners benefit from the colder end of this spectrum, while some ales can be crashed slightly warmer.

Avoid freezing your beer, which can cause damage to the vessel and affect flavour.


3. Set the Duration: Most beers will achieve excellent clarity within 24 to 48 hours.

For beers with a high sediment load, like heavily dry-hopped IPAs or dark stouts, you may need to extend this period to 72 hours to allow everything to settle fully.


4. Monitor the Process: Keep an eye on your temperature to ensure it remains stable.

Logging your process will help you replicate your successes and refine your technique for future batches.

Troubleshooting Common Cold Crashing Issues ๐Ÿง

Even a simple process can have challenges.


Here’s how to handle them:


  • Oxygen Suck-Back: This is the biggest risk.

    As the gas in your fermenter's headspace cools, its pressure drops (according to the Ideal Gas Law), creating a vacuum.

    This can suck the liquid from your airlock (and dreaded oxygen) back into your beer.

    Trick: To prevent this, you can replace your airlock with a sanitized solid bung once fermentation is confirmed complete, or even better, attach a CO₂ tank with a regulator set to 1-2 PSI to maintain positive pressure.

    We do appreciate this is likely a step too far for simple home beer kit brewers!

  • Sediment Won’t Drop: If clarity is still an issue, it’s time for fining agents.

    Adding gelatin or Biofine during the cold crash will bind to particles and accelerate settling.
  • Over-Carbonation in Bottles: This is usually caused by bottling before fermentation is truly finished.
Always trust your hydrometer over visual cues.

If you are certain fermentation was complete, you may need to slightly adjust your priming sugar calculations for the colder, denser beer.

Post-Crash Protocol: Packaging and Conditioning ๐Ÿพ

Once the crash is complete, handle your beer with care.


The primary goal is a gentle, oxygen-free transfer to bottles or a keg.


Use an auto-siphon and position it carefully above the yeast cake to avoid stirring up the sediment you just worked so hard to settle.


Next comes conditioning, where the beer matures and develops its final character.


Lighter styles like lagers may need several weeks of cold conditioning (lagering) to become perfectly smooth.


Heavier styles like stouts can also benefit from extended conditioning time to mellow out complex flavours.


Finally, store your bottles upright.


This ensures any remaining sediment settles at the bottom, allowing you to pour a clean, clear glass.


Always keep your beer in a cool, dark place to prevent light exposure, which can cause "skunking," a common off-flavour from a photochemical reaction.


Skunking is a fault you want to avoid at all costs.

Advanced Techniques and Best Practices ✨


To achieve ultimate clarity, fining agents are a game-changer.


Agents like gelatin or Biofine Clear are electrostatically charged and act like magnets, binding to yeast, proteins, and hop haze, and dragging them to the bottom of the fermenter.


Remember that not all beers require the same treatment.


For a hazy IPA, a hard cold crash can strip away the desirable haze that contributes to its flavour and mouthfeel.


For these styles, consider a "soft crash" to a warmer temperature (e.g., 10°C / 50°F) to settle out only the heaviest yeast without sacrificing the haze.


In contrast, for a pilsner or lager where brilliant clarity is paramount, a full, cold crash is essential.

Cold Crashing vs. Other Clarification Methods ๐Ÿป

Cold crashing is a powerful and low-cost tool for achieving brilliant clarity, but it's essential to understand its place within the broader spectrum of clarification techniques.


The right choice depends on your specific goals, the beer style you're brewing, your budget, and your timeline.


Let's take a deeper dive into how cold crashing compares to the other primary methods.


Filtration


Mechanism: Filtration is a purely mechanical process.


Beer is forced through a porous filter medium with a specific micron rating, physically stripping out suspended particles like yeast, proteins, and hop particulates.


A 5-micron filter will remove most yeast, while a 1-micron filter provides a brilliant "polish."


Pros:

  • Speed: Filtration is almost instantaneous.

    It can take a beer from cloudy to crystal clear in the time it takes to transfer it from one keg to another, whereas cold crashing requires 1-3 days.
  • Absolute Clarity: It can achieve a commercial-level, polished brilliance that is difficult to replicate with gravity-based methods alone.


Cons:

  • Cost and Complexity: This is a major barrier for most homebrewers.

    It requires dedicated equipment like filter housings, single-use cartridges, tubing, and often a pump, which represents a significant investment.
  • Flavor and Aroma Stripping: This is the most significant drawback.

    Fine filtration is indiscriminate; it can strip out desirable hop oils (aroma), proteins that contribute to a full mouthfeel and stable head retention, and even some color compounds.

    Cold crashing is far more gentle, primarily targeting the largest and least stable particles.
  • High Risk of Oxidation: Pushing beer through a filter system creates a massive opportunity for oxygen exposure, which can ruin a beer's flavour and long-term stability.

    Mitigating this requires a sophisticated setup with the ability to completely purge the entire system with CO₂.


Verdict: While highly effective, filtration is generally overkill for most homebrewers.


It's best suited for those dedicated to brewing perfectly brilliant American Light Lagers or other styles where absolute clarity is paramount and who have the kegging equipment and expertise to manage the high risk of oxidation.


Extended Conditioning (Lagering & Aging)


Mechanism: This method relies on time and gravity.


By holding a beer at cold temperatures (typically 0-4°C or 32-40°F) for several weeks or months, particles like yeast and proteins are given a very long time to settle naturally.


This is essentially a very slow, prolonged cold crash.


Pros:


  • Flavour Maturation: The primary benefit of lagering is not just clarity, but flavour development.

    Over this extended period, yeast continues to work, cleaning up fermentation byproducts like diacetyl (buttery) and acetaldehyde (green apple), resulting in an exceptionally smooth, clean, and integrated flavour profile that a quick cold crash cannot produce.
  • Simplicity: No extra steps are required beyond maintaining a stable cold temperature and being patient.

Cons:


  • Time: This is the biggest trade-off.

    A cold crash achieves remarkable clarity in days; true lagering takes weeks or months.
  • Ties Up Equipment: Your beer will occupy a fermenter and valuable space in your temperature-controlled chamber for a very long time, limiting your brewing pipeline.


Verdict: Extended conditioning is a process, not just a technique.


It's essential for traditional lager styles where flavour maturation is just as important as clarity.


For these beers, a cold crash is simply one of the final steps within the longer lagering process.


Clarifying Agents (Finings)


Mechanism: Finings are additives that work through electrostatic charge, binding with suspended particles to create larger clumps (floccules) that settle out much faster.


They are best thought of as a booster for gravity-based clarification.


  • Kettle Finings (e.g., Irish Moss, Whirlfloc): Added during the last 10-15 minutes of the boil.

    These negatively charged carrageenan products bind with positively charged proteins in the hot wort, creating a better "hot break."

    This removes potential haze-formers before fermentation even begins.
  • Post-Fermentation Finings: These are added after fermentation is complete, often in conjunction with cold crashing.

    This includes agents like Gelatin & Isinglass, which are positively charged and bind with yeast, and Silica-Based finings that excel at removing protein haze.


Pros:


  • Synergy with Cold Crashing: Fining agents are not an alternative to cold crashing; they are an enhancement.

    By creating larger, heavier particles, they dramatically accelerate the sedimentation process as described by Stokes' Law, making your cold crash faster and more effective.
  • Targeted Action: You can choose an agent that specifically targets what is making your beer hazy, whether it's yeast or protein.

Cons:


  • Dietary/Allergen Concerns: Many popular finings are animal-derived (gelatin, isinglass from fish, chitosan from shellfish), making them unsuitable for vegan beers.
  • Potential for Stripping: While far more gentle than filtration, overuse of some finings can potentially reduce some desirable mouthfeel and head-retention compounds.


Verdict: Using fining agents is one of the best ways to elevate your clarification game.


Combining a kettle fining during the boil with a post-fermentation agent like gelatin during the cold crash is a powerful, synergistic approach that yields exceptionally clear beer without the cost and risks of filtration.

Back to Top